The 「Brushes」 dialog is used to select and manage brushes. These brushes are used by the Paintbrush, Pencil and Airbrush tools. The MyPaint Brush uses its own kind of brushes. GIMP comes with a wide selection of brushes and more can be added easily. You can also create custom brushes using the Brush Editor, or by exporting an image as a brush.
See the Brushes section for basic information on brushes and how they are used in GIMP.
There can be only one brush active at any time. To make a brush active, select it in the list or grid. The name of the currently active brush is shown directly above the list of brushes. The active brush can also be recognized by a selection rectangle around the preview (which can sometimes be difficult to see, depending on your theme). The size, angle, spacing and several other characteristics of a brush can be set in the Tool Options Dialog when one of the relevant paint tools is active.
「バッファー」ダイアログはドッキング可能です。 その扱い方については 「ダイアログとその合体」 の節をご覧ください。
-
From the main menu select → → .
-
From the Tab menu in any dockable dialog click the tab menu button
 and select
→ .
and select
→ .
-
If you enabled the 「Show active brush, pattern & gradient」 option in the Toolbox Preferences, you can click on the active brush icon in the Brush, Pattern, Gradient area.
-
From the Tool Options dialog for the Paintbrush, Pencil and Airbrush tools, by clicking on the Brush icon button. This opens a popup with similar functionality that allows you to quickly choose a brush from the list. To open the actual brush dialog click on the button at the bottom right corner of the popup.
簡約「ブラシ」ダイアログ
The button bar at the bottom offers the following functionality:
-
 Smaller previews
-
 Larger previews
-
 View as list
-
 View as grid
-
 Open the brush selection dialog
Note that, depending on your Preferences, a brush selected with the popup may only apply to the currently active tool, not to other paint tools. See the Paint Options Shared Between Tools section in the Tool Options Preferences for more information.
-
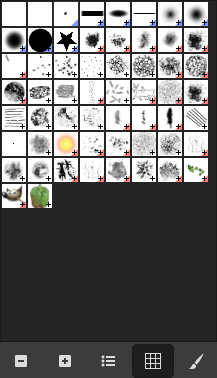
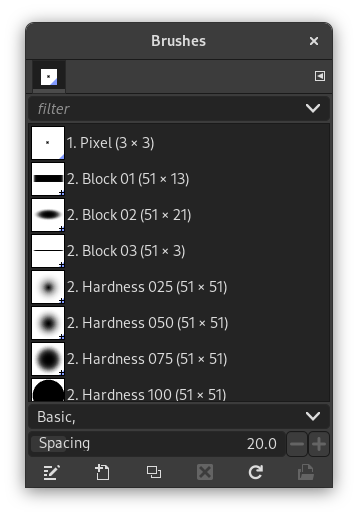
In the Tab menu, you can choose between and . In Grid mode, the brush shapes are laid out in a rectangular array, making it easy to see many at once and find the one you are looking for. In List mode, the shapes are lined up in a list, with the names beside them.
In the Tab menu, the option Preview Size allows you to adjust the size of brush previews to your liking.
- 並べて表示
-
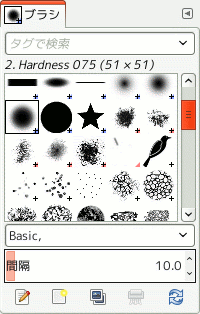
ダイアログの上部に現在選択されているブラシの名前と大きさ (ピクセル単位) が表示されます。
利用可能なブラシの見本が升目状に並べられていて、 現在選択されたブラシは枠線で囲まれます。
- 一覧表に列挙して表示
-
基本的には「並べて表示」と使い方に大差ありませんが、 次の点が異なります。
ブラシの名前はダブルクリックすると編集ができます。 ただし名前を変更できるのは自作のブラシや自前でインストールしたものに限られ、 GIMP 同梱でインストールされたブラシは対象外です。 仮に同梱版のブラシの名前を変えてみれば確かに編集はできますが、 確定しようとして Enter キーを押したりどこか他のところをクリックするとたちまち名前は元に戻されてしまいます。 GIMP と同時にインストールされるブラシ、 パターン、 グラデーションなどの資源は原則として変更不可です。 変更できるのは自作のものや自前のものだけです。
When you click on a brush preview, it becomes the active brush that will be used when using one of the relevant painting tools. Double-clicking a brush preview, activates the Brush Editor.
Brushes can be managed in several ways using the buttons at the bottom of the dialog or the right-click context menu.
Meaning of the symbols at the bottom right corner of a brush preview
-
A plus sign indicates that the brush preview is shown at a reduced size. To preview the normal size, left click and hold the preview.
-
A blue corner indicates the brush is a parametric brush, created with the Brush Editor.
-
A red corner indicates this is an animated brush. To preview the animation, left click and hold the preview.
On the right side, next to the filter selection, there is a
![]() Use theme colors for preview button.
Use theme colors for preview button.
By default, brushes and fonts show a white background for each preview. If you prefer the background to be more in line with your theme, you can toggle that by clicking this button. GIMP will then use the background color as set by your theme.
The 「filter」 drop-down allows you to select one or more tags to filter and reduce the number of brushes shown. The 「tags」 can be managed below the preview area. For more information on tagging see 「タグづけ」.
The button bar at the bottom offers the following functionality:
-
 ブラシを編集
-
This activates the Brush Editor. Pressing the button will open the Editor for any brush. It only works, however, for parametric brushes, which can be recognized by the blue bottom right corner in the preview. For other types of brushes the Editor will show you a preview, but not allow you to make any changes.
-
 新しいブラシを作成
-
This creates a new parametric brush, initializes it with a small fuzzy round shape, and opens the Brush Editor so that you can modify it. The new brush is automatically saved in your personal Brushes Folder.
-
 ブラシの複製
-
This button is only enabled if the currently selected brush is a parametric brush. If so, the brush is duplicated, and the Brush Editor is opened so that you can modify the copy. The result is automatically saved in your personal Brushes Folder.
-
 ブラシの削除
-
This option is active for parametric brushes only. This removes all traces of the brush, both from the dialog and the folder where its file is stored, if you have permission to do so. It asks for confirmation before doing anything. The brushes that come with GIMP can not be removed.
-
 ブラシの更新
-
If you add brushes to your personal Brushes Folder or any other folder in your brush search path, by some means other than the Brush Editor, this button causes the list to be reloaded, so that the new entries will be available in the dialog.
-
 Open brush as image
-
Clicking this, opens the selected brush as a regular image that you can edit. It can be turned back into a brush by copying it and selecting → → , or by exporting it as a brush. This is different from 「ブラシエディター」 that allows you to modify an existing parametric brush.
The functions performed by these buttons can also be accessed from the dialog pop-up menu, activated by right-clicking anywhere in the brush grid/list, or by choosing the top item, , from the tab menu.
Right clicking on a brush preview opens a context menu. Most of the commands of this submenu are described with the Buttons, except for the following.
- Copy Brush Location
-
Copy Brush Location allows you to copy the brush path to the clipboard. After that you can use the → , command, to open the brush as a new image.
- Show in File Manager
-
Show in File Manager opens the location of the brush in the default File Manager on your system.
- Elliptical, Feathered…, Elliptical…, Rectangular, Feathered…, Rectangular…
-
Options to create elliptical and rectangular brushes. These brushes can be feathered, but they are not parametric brushes.
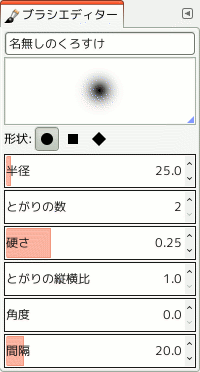
ブラシエディターでは GIMP とともに提供されたブラシの媒介変数を見られます (ただしそれらの変更は不可)。 ブラシの自作もできます。 「新しいブラシを作成」ボタン ![]() をクリックするとブラシの編集機能がはたらきはじめます。 そこで円形、 正方形、 菱形のような幾何学図形が選べます。 このエディターの各部品を順に見てゆきましょう。
をクリックするとブラシの編集機能がはたらきはじめます。 そこで円形、 正方形、 菱形のような幾何学図形が選べます。 このエディターの各部品を順に見てゆきましょう。
The dialog bar:
As with all dialog windows, the
tab menu button
![]() opens a menu allowing you to access and set further related options.
opens a menu allowing you to access and set further related options.
ブラシの名称欄: ブラシの名前が表示されており編集できます。
ブラシのプレビュー領域: ブラシの諸元を調整するたび即座にその変更が反映されます。
- 形状
-
円形、 正方形、 菱形があります。 この原型をこのあとのオプションで調整してゆきます。
- 半径
-
ブラシの中心から外縁までの横方向の距離です。 仮に半径が 10 ピクセルとすれば形状が正方形ならその各辺は 20 ピクセルです。 半径が 5 ピクセルな菱形ならその各辺はおよそ 7 ピクセルになります。
- とがり
-
この数は正方形と菱形に対してのみ効果があります。 正方形の場合は数を増やすと形状の角が増え多角形になります。 菱形の場合は星型です。
- 強度
-
この値はブラシの境界のぼかし具合を制御します。 最大値 1.00 にするとぼかしはありません。 値のとれる範囲は 0.00 から 1.00 です。
- 縦横比
-
この値はブラシの幅と高さの比を制御します。 たとえば菱形で半径 5 ピクセル、 縦横比 2.0 とすれば、 幅 10 ピクセル高さ 5 ピクセルの扁平なブラシができます。 値のとれる範囲は 1.0 から 20.0 です。
- 角度
-
This angle is the angle between the brush width direction, which is normally horizontal, and the horizontal direction, clock-wise. When this value increases, the brush width turns clock-wise (0° to 180°).
- 間隔
-
ブラシは線を描くとき実際はそのブラシの刻印を線上に並べます。 ブラシの刻印がよく重なって密着しておれば均質な線の印象が得られます。 その場合の間隔は 1.00 です。 値のとれる範囲は 1.00 から 200.0 です。
The Brush Editor has a context menu that can be opened with the
tab menu button
![]() and then choosing
. It only has one option.
and then choosing
. It only has one option.
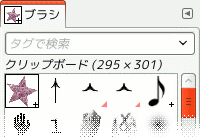
画像の選択範囲や全体像を取り込んだり切り取ったりすると、 その写しが「ブラシ」ダイアログの左上の区画に新たなブラシとして現れます。 このブラシは再び何かの画像や選択範囲を取り込むまでその内容が保たれます。 GIMP を終了すると消えます。
![[注記]](images/note.png)
|
注記 |
|---|---|
|
You can save this clipboard brush with → → as soon as it appears in the 「Brushes」 dialog. See 「クリップボードから生成 → 新しいブラシ...」. |


