Содержание
- 1. Панель инструментов
- 2. Инструменты выделения
- 3. Инструменты рисования
-
- 3.1. Общие свойства
- 3.2. Динамика
- 3.3. Кистевые инструменты (Карандаш, Кисть, Аэрограф)
- 3.4. Плоская заливка
- 3.5. Градиент
- 3.6. Карандаш
- 3.7. Кисть
- 3.8. Ластик
- 3.9. Аэрограф
- 3.10. Перо
- 3.11. Кисть MyPaint
- 3.12. Штамп
- 3.13. Лечебная кисть
- 3.14. Штамп по перспективе
- 3.15. Размытие/резкость
- 3.16. Размазывание
- 3.17. Осветление/затемнение
- 4. Инструменты преобразования
- 5. Другие инструменты
GIMP предоставляет большой набор инструментов для быстрого выполнения таких простых задач, как создание выделений или контуров. Здесь детально описаны инструменты, находящиеся на панели инструментов программы.
(Если вам интересно, на языке GIMP «инструмент» — способ работы над изображением, который требует доступ к его видимой части либо для того, чтобы показать, что вы хотите сделать, перемещая указатель, либо для того, чтобы показать результаты уже внесённых изменений. Но если вы предпочтёте считать инструмент пилой, а изображение — деревом, особого вреда от этого не будет.)
![[Примечание]](images/note.png)
|
Примечание |
|---|---|
|
Более подробно панель инструментов и её элементы рассмотрены в главе Основные окна: Панель инструментов. |
В программе GIMP есть множество инструментов, с помощью которых можно выполнять самые разнообразные задачи. Все эти инструменты можно разделить на следующие категории:
-
Инструменты выделения, которые определяют или изменяют область в изображении, над которой будут работать другие инструменты;
-
Инструменты рисования, которые изменяют цвета в какой-то отдельной области изображения;
-
Инструменты преобразования, которые изменяют геометрию изображения;
-
Инструменты цвета, которые изменяют цвета изображения в целом;
-
Другие инструменты, которые не попадают ни в одну из других категорий.
Большинство инструментов можно активировать, нажав на значок на панели инструментов. По умолчанию некоторые инструменты доступны только через меню. Каждый инструмент можно активировать из меню (или для некоторых инструментов цвета). Большинство инструментов также можно активировать с клавиатуры с помощью быстрой клавиши.
В настройке по умолчанию, созданной при первой установке GIMP, не все инструменты отображаются в виде значков на панели инструментов: некоторые инструменты отсутствуют. Вы можете настроить набор инструментов, отображаемых на панели инструментов, в параметрах панели инструментов.
Есть две причины, по которым может потребоваться это сделать: во-первых, если инструмент редко используется, вам будет проще найти нужные инструменты, если убрать отвлекающий значок; во-вторых, если вы используете инструменты, которые по умолчанию отсутствуют на панели инструментов, вам может бы удобно, чтобы значки для них были легко доступны. В любом случае, можно всегда получить доступ к любому инструменту с помощью пункта главного меню или .
По умолчанию значки инструментов сгруппированы. Группы обозначаются маленьким тёмным треугольником в правом нижнем углу значка. Значок группы отображается последним используемым инструментом в группе. Щёлкните правой кнопкой мыши по значку группы, чтобы отобразить список инструментов в группе.
Вы можете отобразить все инструменты, сняв флажок Использовать группы инструментов в Раздел 6.13, «Панель инструментов».
По умолчанию форма указателя меняется, когда он находится внутри изображения, на форму, указывающую на активный инструмент. Вы можете изменить это поведение в в разделе Указатели параметров устройств ввода.
Рисунок 14.2. Область цвета переднего плана/фона на панели инструментов
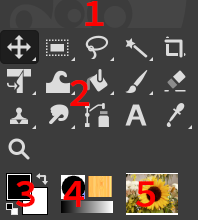
Область цвета переднего плана/фона, обозначенная (3)
- Область цвета
-
Область цвета показывает текущие цвета переднего плана и фона GIMP, которые используются для рисования, заливки и многих других операций. Щелчок по любому из них вызывает диалоговое окно выбора цвета, которое позволяет изменить цвет на другой.
- Цвета по умолчанию
-
Нажатие на этот символ сбрасывает цвета переднего плана и фона на чёрный и белый соответственно. Нажатие клавиши D имеет тот же результат.
- Поменять местами цвета переднего плана и фона
-
Нажатие на маленькую кривую со стрелками на концах или клавиши X меняет местами цвет переднего плана и фона.
![[Подсказка]](images/tip.png)
Подсказка Один из этих цветов можно передвинуть прямо на слой. Тогда цвет заполнит весь слой.
Рисунок 14.3. Область активных кистей, текстур и градиентов на панели инструментов

Область активных кистей, текстур и градиентов, обозначенная (4)
По умолчанию эта область не отображается. Её можно добавить с помощью пункта меню → → : Раздел 6.13, «Панель инструментов».
Эта часть панели инструментов показывает активную кисть, текстуру и градиент. Нажатие на любом из них покажет соответствующий диалог с параметрами.
Рисунок 14.4. Область активного изображения на панели инструментов

Область активного изображения, обозначенная (5)
По умолчанию эта область не отображается. Её можно добавить с помощью пункта меню → → : Раздел 6.13, «Панель инструментов».
В этой области отображается миниатюра активного изображения. Если щёлкнуть по этой миниатюре, откроется диалоговое окно Изображения. Это может быть полезно, если на экране много изображений.
Если вы используете GIMP в Unix-подобной операционной системе с X Window System, вы также можете перетащить миниатюру во включённый файловый менеджер XDS, чтобы напрямую сохранить соответствующее изображение.
Если у вас используемое по умолчанию расположение диалогов, при активации инструмента палитра «Параметры инструмента» появится под панелью инструментов. Если эта палитра у вас скрыта, стоит вернуть её на место: очень трудно эффективно использовать инструменты, не имея возможности быстро изменить параметры их работы.
![[Подсказка]](images/tip.png)
|
Подсказка |
|---|---|
|
The Tool Options appear beneath the Toolbox in the default setup. If you lose it somehow, you can get it back by creating a new Tool Options dialog using → → and then docking it below the Toolbox. Alternatively you can double-click any tool button in the Toolbox as a quick way to open the Tool Options. If it appears in a different dock than the one you want, you can drag it to your preferred dock. See the section on Dialogs and Docking if you need help moving the Tool Options. |
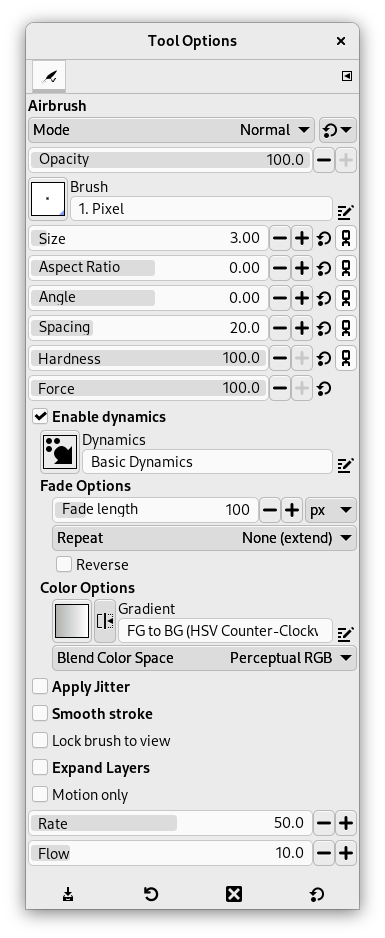
У каждого инструмента есть свой определённый набор параметров. Выбранные пользователем значения этих параметров сохраняются на протяжении сеанса до тех пор, пока пользователь не изменит эти значения. Фактически, параметры инструментов сохраняются и между сеансами. Сохранение параметров инструмента с прошлого рабочего сеанса может иногда ощущаться как неприятное недоразумение: инструмент ведёт себя очень странно, пока пользователь не вспомнит, что во время прошлого рабочего сеанса, две недели назад, был использован какой-то редко используемый параметр.
В самой нижней части диалога параметров инструмента расположены четыре кнопки:
-
Сохранить профиль инструмента…
-
Эта кнопка позволяет сохранить значения параметров текущего инструмента для последующего их восстановления. Она запускает Раздел 7.2, «Диалог профилей инструментов», в котором можно дать имя новому профилю. Во время восстановления параметров показываются только сохранённые профили активного инструмента, так что нет нужды беспокоиться о том, чтобы указывать название инструмента вместе с присвоением имени профиля.
-
Восстановить профиль инструмента…
-
С помощью этой кнопки можно восстановить набор значений параметров активного инструмента, ранее сохранённый в профиле. Если для активного инструмента никогда не сохранялись профили, то эта кнопка будет недоступна для нажатия. В противном случае после её нажатия будет запущено меню с названиями всех сохранённых профилей: выбор элемента меню применяет сохранённые в нём параметры.
-
Удалить профиль инструмента
-
С помощью этой кнопки можно удалить набор значений параметров активного инструмента, ранее сохранённый в профиле. Если для активного инструмента никогда не сохранялись профили, то на этой кнопке будет просто повторяться название инструмента. В противном случае после её нажатия будет запущено меню с названиями всех сохранённых профилей: выбранный профиль будет удалён.
-
Восстановить значения по умолчанию
-
Эта кнопка сбрасывает параметры активного инструмента до значений по умолчанию. Если удерживать клавишу Shift при нажатии кнопки сброса, параметры всех инструментов будут сброшены до значений по умолчанию.
В дополнение к командам для вышеуказанных кнопок меню вкладки «Параметры инструментов» имеет дополнительное подменю:
- Изменить профиль инструмента
-
Это вложенное меню показывает список профилей для активного инструмента, которые можно редактировать. Выбор одного из них откроет редактор профилей инструментов с загруженным профилем этого инструмента. В нём вы можете изменить профиль, если он не является одним из профилей по умолчанию, поставляемых с GIMP.
Ниже мы объясним взаимодействие с ползунками и колесом прокрутки мыши.
- Новые ползунки
-
Можно использовать несколько модификаторов с помощью левой кнопки мыши или колеса прокрутки:
Таблица 14.1. Взаимодействие со Slider Widget
Мышь/комбинация клавиш
Действие 
Изменить значение на то, что находится под указателем 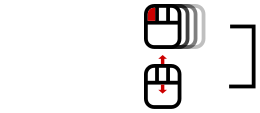
Изменить значение с помощью стандартного шага 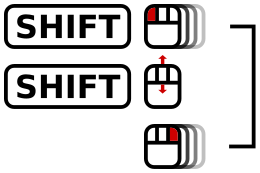
Shift + или
Изменить значение с помощью меньшего шага 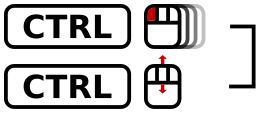
Ctrl +
Изменить значение с помощью большего шага 
Перейти в режим ввода чисел, не выбирать значение 
Перейти в режим ввода чисел, выбрать значение Подсказка: любое взаимодействие с левой кнопкой мыши включает режим ввода чисел.
Как только примерное значение было установлено, его можно более точно настроить с помощью двух маленьких кнопок со стрелками справа от ползунка.
Область значения в области ползунка работает по принципу текстового редактора: там можно изменить значение или напрямую ввести новое.
Для некоторых параметров можно перетащить указатель за пределы диалогового окна инструмента. Например, с помощью ползунка размера можно получить максимальное значение (10 000).
- Действия с колесом мыши на холсте
-
При работе с инструментами можно использовать колесо мыши вместе с клавишами-модификаторами, что даёт возможность удобной настройки параметров выбранного инструмента:
-
Alt + колесо мыши: увеличить/уменьшить непрозрачность
-
Shift+Primary + колесо мыши: увеличить/уменьшить соотношение сторон
-
Shift+Alt + колесо мыши: увеличить/уменьшить угол
-
Primary+Alt + колесо мыши: увеличить/уменьшить размер
-
Shift+Primary+Alt + колесо мыши: увеличить/уменьшить интервал
Примечание: модификатор Primary — это обычно Ctrl или Cmd, в зависимости от вашей платформы.
-
