Inhaltsverzeichnis
- 1. Der Werkzeugkasten
- 2. Auswahlwerkzeuge
- 3. Malwerkzeuge
-
- 3.1. Allgemeine Eigenschaften
- 3.2. Dynamiken
- 3.3. Pinselwerkzeuge (Stift, Pinsel, Sprühpistole)
- 3.4. Füllen (Fülleimer)
- 3.5. Farbverlauf
- 3.6. Stift
- 3.7. Pinsel
- 3.8. Radierer
- 3.9. Sprühpistole
- 3.10. Tinte
- 3.11. MyPaint-Pinsel
- 3.12. Klonen
- 3.13. Heilen
- 3.14. Perspektivisches Klonen
- 3.15. Weichzeichnen / Schärfen
- 3.16. Verschmieren
- 3.17. Abwedeln/Nachbelichten
- 4. Transformationswerkzeuge
- 5. Other Tools
GIMP verfügt über eine umfangreiche Sammlung von Werkzeugen. Diese können Sie verwenden, um sehr schnell grundlegende Aufgaben wie das Erstellen einer Auswahl oder das Zeichnen von Pfaden zu erledigen. Der Werkzeugkasten enthält alle diese Werkzeuge, welche wir Ihnen nachfolgend detailliert vorstellen werden.
(Falls es Sie interessiert: in der GIMP-Fachsprache ist ein „Werkzeug“ die Art und Weise, auf ein Bild einzuwirken, welche einen Zugriff auf dessen Darstellung erfordert. Dies funktioniert entweder derart, dass Sie festlegen, was verändert werden soll, oder indem Sie interaktiv eine Veränderung der Darstellung aufgezeigt bekommen. Wenn Sie sich jedoch unter einem Werkzeug lieber eine Säge und unter einem Bild ein Stück Holz vorstellen möchten, so wird sich das auch nicht nachteilig auswirken.)
![[Anmerkung]](images/note.png)
|
Anmerkung |
|---|---|
|
Eine Übersicht über den Werkzeugkasten und seine Komponenten finden Sie in Benutzeroberfläche: Werkzeugkasten. |
GIMP has a diverse assortment of tools that let you perform a large variety of tasks. The tools can be thought of as falling into the following categories:
-
Auswahlwerkzeuge, welche den Bereich des Bildes festlegen oder anpassen, auf den die anschließenden Aktionen angewendet werden;
-
Malwerkzeuge, mit welchen sich die Farben in einzelnen Bildteilen verändern lassen;
-
Transformationswerkzeuge zur Bearbeitung der Bildgeometrie;
-
Color tools, which alter the colors in the image as a whole;
-
Other tools, which don't fall into the other categories.
Most tools can be activated by clicking on an icon in the Toolbox. By default, some tools are accessible only via the menus. Every tool can be activated from the menu (or the menu for some color tools). Most tools can also be activated from the keyboard using an accelerator key.
In the default setup, created when GIMP is first installed, not all tools show icons in the Toolbox: some tools are omitted. You can customize the set of tools that are shown in the Toolbox in the Toolbox Preferences.
There are two reasons you might want to do this: first, if you only rarely use a tool, it might be easier to find the tools you want if the distracting icon is removed; second, if you use tools that are not found in the toolbox by default, you might find it convenient to have icons for them easily available. In any case, you can always access any tool at any time using the or menu from the main menu.
Tool icons are grouped by default. Tool groups are marked with a small dark triangle at the bottom right corner of the icon. The group icon displayed is the last used tool in the group. Right click on the group icon to display the list of tools in the group.
You can get all tools displayed by unchecking the Use tool groups option in Abschnitt 6.13, „Werkzeuge“.
By default, the shape of the pointer changes when it is inside an image, to a shape that indicates which tool is active. You can change this behavior in the Pointers section of the Input Devices settings.
Abbildung 14.2. Foreground/Background Colors Area in the Toolbox
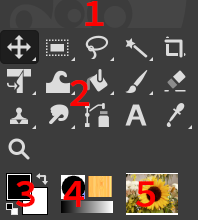
The Foreground/Background Colors area, marked with (3)
- Farbübersicht
-
The color area shows GIMP's current foreground and background colors, which are used for painting, filling, and many other operations. Clicking on either one of them brings up a color selector dialog that allows you to change to a different color.
- Standardfarben
-
Clicking on the small symbol in the lower left corner resets the foreground and background colors to black and white. Pressing the D key has the same effect.
- Swap Foreground/Background colors
-
Clicking on the double-headed arrow symbol swaps the foreground and background colors. Pressing the X key has the same effect.
![[Tipp]](images/tip.png)
Tipp Wenn Sie eine Farbe anklicken und in eine Ebene ziehen, wird die Ebene mit dieser Farbe gefüllt.
Abbildung 14.3. Active Brush, Pattern and Gradient Area in the Toolbox

The Active Brush, Pattern and Gradient area, marked with (4)
By default, this area is not displayed. You can add this area through → → : Abschnitt 6.13, „Werkzeuge“.
In diesem Teil des Werkzeugkastens haben Sie mit einem Mausklick Zugriff auf die Pinsel-, Muster- und Farbverlaufsauswahl. Sie können auf einen der Bereiche klicken, um einen Dialog zu öffnen, über den Sie die jeweilige Auswahl ändern können.
By default, this area is not displayed. You can add this area through → → : Abschnitt 6.13, „Werkzeuge“.
A thumbnail of the active image is displayed in this area. If you click on this thumbnail, the Images dialog is opened. This can be useful if you have many images on your screen.
If you use GIMP on a Unix-like operating system with the X Window System, you can also drag and drop the thumbnail to an enabled XDS file manager to directly save the corresponding image.
Abbildung 14.5. Der Werkzeugeigenschaften-Dialog
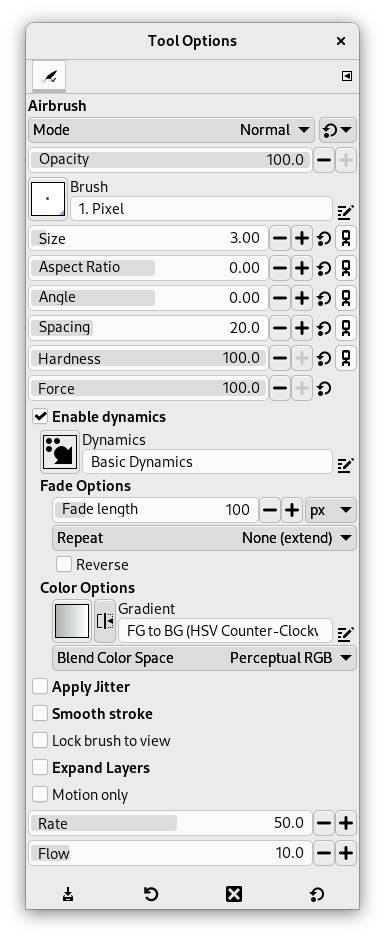
Der Werkzeugeigenschaften-Dialog des Werkzeugs »Sprühpistole«
Für gewöhnlich erscheint beim Aktivieren eines Werkzeugs der zugehörige Eigenschaften-Dialog unterhalb des Werkzeugkastens. Falls dies bei Ihnen nicht der Fall ist, sollten Sie den Dialog an einer anderen Stelle eingeblendet haben, denn es erleichtert Ihnen die Arbeit mit einem Werkzeug sehr, wenn Sie seine Einstellungen leicht überprüfen und ändern können.
![[Tipp]](images/tip.png)
|
Tipp |
|---|---|
|
The Tool Options appear beneath the Toolbox in the default setup. If you lose it somehow, you can get it back by creating a new Tool Options dialog using → → and then docking it below the Toolbox. Alternatively you can double-click any tool button in the Toolbox as a quick way to open the Tool Options. If it appears in a different dock than the one you want, you can drag it to your preferred dock. See the section on Dialogs and Docking if you need help moving the Tool Options. |
Jedes Werkzeug hat seine eigenen, speziellen Einstellungen. Die von Ihnen vorgenommenen Einstellungen bleiben erhalten, bis Sie GIMP beenden oder die Einstellungen erneut ändern. Genau genommen bleiben die Einstellungen an den Werkzeugen sogar erhalten, wenn Sie GIMP beenden und später neu starten. Dieses Verhalten kann gelegentlich irritierend sein. Stellen Sie sich vor, ein Werkzeug verhält sich nach einem Neustart von GIMP plötzlich sehr merkwürdig und Sie finden den Grund dafür nicht - bis Sie sich erinnern, dass sie, als sie vor Tagen oder Wochen das letzte Mal mit GIMP gearbeitet haben, genau diese ungewöhnlichen Werkzeugeinstellungen benötigten.
Am unteren Rand des Werkzeugeinstellungen-Dialogs befinden sich vier Knöpfe:
-
Save Tool Preset…
-
This button allows you to save the settings for the current tool, so that you can restore them later. It brings up the Abschnitt 7.2, „Der Dialog „Werkzeug-Voreinstellungen““ allowing you to give a name for the new preset. When you Restore options, only saved presets for the active tool are shown, so you need not worry about including the name of the tool when you assign a name here.
-
Restore Tool Preset…
-
This button allows you to restore a previously saved preset of options for the active tool. If no presets have ever been saved for the active tool, the button will be disabled. Otherwise, clicking it will bring up a menu showing the names of all saved option sets: choosing a menu entry will apply those settings.
-
Delete Tool Preset
-
Dieser Knopf erlaubt es Ihnen, zuvor gespeicherte Einstellungen zum aktiven Werkzeug zu löschen. Wurden die Eigenschaften des aktiven Werkzeuges noch nie gespeichert, gibt der Knopf nur den Werkzeugnamen wieder. Anderenfalls öffnet sich nach einem Klick auf den Knopf ein Menü mit den Namen aller gespeicherten Voreinstellungen: Die ausgewählte Voreinstellung aus diesem Menü wird gelöscht.
-
Reset to default values
-
This button resets the options for the active tool to their default values. If you hold the Shift key while pressing the Reset button, the options for all tools will be reset to their default values.
In addition to the commands for the above buttons, the Tool Options tab menu has an extra submenu:
- Edit Tool Preset
-
This submenu shows a list of presets for the active tool that you can edit. Selecting one of them will open the Tool Presets Editor with that tool preset loaded. From there you can edit the preset, unless it is one of the default presets that come with GIMP.
Below we will explain the interaction with sliders and the mouse scroll-wheel.
- Neue Schieberegler
-
You can use multiple modifiers with either left-click or mouse wheel scrolling:
Tabelle 14.1. Interaction with the Slider Widget
Mouse / key combination
Action 
Change the value to what's under the pointer 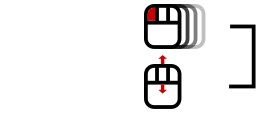
Change the value using the default increment 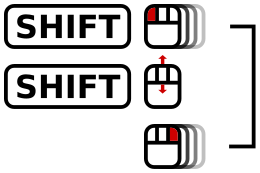
Shift + or
Change the value using smaller increment 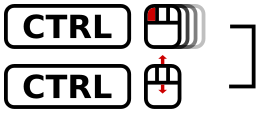
Ctrl +
Change the value using larger increment 
Enter numeric input mode, do not select the value 
Enter numeric input mode, select the value Hint: Any left-click interaction enables numeric input mode.
Sobald Sie den Wert grob eingestellt haben, verwenden Sie die beiden kleinen Pfeilknöpfe rechts des Reglers für eine Feineinstellung.
Der Wertbereich im Schiebereglerbereich funktioniert wie ein Texteditor. Bearbeiten Sie den Wert oder geben Sie direkt einen neuen Wert ein.
For some options, you can drag the pointer outside the tool dialog. For example with the size slider, you can get the maximum value (10000) so.
- Mouse Scroll-Wheel actions on canvas
-
Bei der Anwendung von Werkzeugen können Sie das Mausrad in Kombination mit verschiedenen Zusatztasten dazu verwenden, die Einstellungen des ausgewählten Werkzeugs zu ändern:
-
Alt + Mouse-wheel: Deckkraft erhöhen/verringern
-
Shift+Primary + Mouse-wheel: Seitenverhältnis erhöhen/verringern
-
Shift+Alt + Mouse-wheel: Winkel erhöhen/verringern
-
Primary+Alt + Mouse-wheel: Größe erhöhen/verringern
-
Shift+Primary+Alt + Mouse-wheel: Abstand erhöhen/verringern
Note: the Primary modifier is usually Ctrl or Cmd, depending on your platform.
-


