Dues maneres fàcils de crear un pinzell nou:
-
Primer, el mètode temporal ràpid. Teniu una àrea d'imatge des de la qual voleu fer un pinzell que s'utilitzarà amb una eina com el llapis, l'aerògraf, etc. Seleccioneu-lo amb l'eina de selecció rectangular (o el·líptica), després aquesta selecció. Immediatament podreu veure aquesta còpia en la primera posició del diàleg de pinzell, i el seu nom és «Porta-retalls». Es pot utilitzar immediatament.
Aquest pinzell és temporal: desapareix quan tanqueu el GIMP. Podeu fer-lo permanent fent clic al botó a la part inferior del panell.
-
El segon mètode és més elaborat.
Seleccioneu → des del menú principal.
Estableix l'amplada i l'alçada, per exemple a 30 píxels.
A les Opcions avançades estableix per exemple l'espai de color a escala de grisos, i estableix Omple ambblanc.
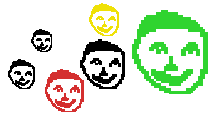
Amplieu aquesta imatge nova per a engrandir-la i li feu un dibuix amb llapis negre.
Seleccioneu → des del menú principal.
Export the image with a
.gbrextension in thebrushesdirectory located inside your personal GIMP configuration folder.En el Diàleg del pinzell, feu clic al botó
 .
.El vostre pinzell apareix al mig dels altres pinzells. Podeu utilitzar-lo immediatament sense reiniciar el GIMP.
Figura 7.21. Passos per a crear un pinzell

Dibuixeu una imatge, anomena i desa com a pinzell
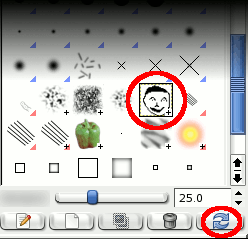
Actualitza els pinzells
Utilitza el pinzell


