Два метода для быстрого создания новой кисти:
-
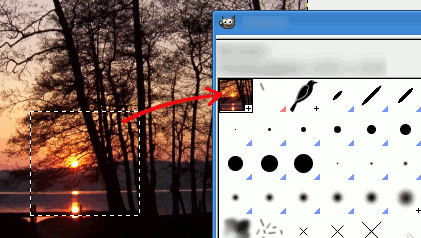
Первый — быстрый временный метод. У вас есть область изображения, из которой вы хотите сделать кисть, чтобы использовать её с инструментом типа карандаша, аэрографа и т. д. Выделите ее прямоугольным (или эллиптическим) инструментом выделения, затем это выделение. Вы сразу же увидите эту копию в первом поле диалога кистей, и её название будет «Буфер обмена». Её можно сразу же использовать.
Эта кисть является временной: она исчезнет при закрытии GIMP. Вы можете сделать её постоянной, нажав кнопку внизу панели кистей.
-
Второй метод более детальный.
Выберите пункт главного меню → .
Установите для Ширины и Высоты, например, 30 пикселей.
В Расширенных параметрахустановите для Цветового пространства значение Градации серого, а для Заливки — Белая.
Увеличьте масштаб изображения для рисования на нём чёрным карандашом.
Выберите пункт главного меню → .
Экспортируйте изображение с расширением
.gbrв каталогbrushes,расположенный в вашей личной папке конфигурации GIMP.В диалоге кистей нажмите кнопку
 .
.Ваша кисть появится среди других кистей. Её можно сразу же использовать без перезапуска GIMP.
Рисунок 7.21. Шаги для создания кисти

Нарисуйте картинку, сохраните как кисть
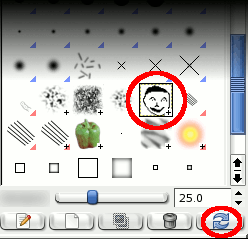
Обновить кисти
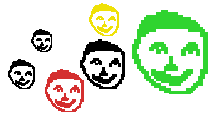
Использовать кисть