The Scale Tool can be used to scale a layer, selection, path or image, depending on the Transform setting.
When you click on your image with the Scale tool,
the Scale dialog is opened, allowing to change the
Width and Height. When the
![]() chain icon is closed, adjustments to one, will adjust the other value
the same percentage. If you do not want this, click the chain icon to
disable the synchronization.
The default size is in pixels, which can be changed in the measurement
drop-down list besides the chain icon.
chain icon is closed, adjustments to one, will adjust the other value
the same percentage. If you do not want this, click the chain icon to
disable the synchronization.
The default size is in pixels, which can be changed in the measurement
drop-down list besides the chain icon.
At the same time a Preview (unless disabled in the Tool Options) is superimposed on the object and handles appear on the corners and borders that you can click and drag to change the dimensions. At the center, a square with a cross inside can be used to move the preview.
Il existe plusieurs possibilités pour accéder à l’outil :
-
From the main menu: → → .
-
By clicking the tool icon
 in the Toolbox.
-
By pressing the Shift+S keyboard shortcut.
- Shift
-
L’appui sur la touche Maj basculera l’option Conserver le rapport.
- Ctrl
-
L’appui sur la touche Ctrl basculera l’option Autour du centre.
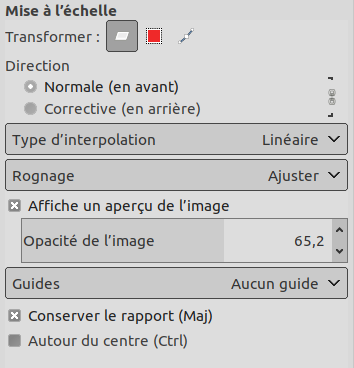
Normally, tool options are displayed in a window attached under the Toolbox as soon as you activate a tool. If they are not, you can access them from the main menu through → → which opens the option window of the selected tool. The available tool options can also be accessed by double clicking the corresponding tool icon in the Toolbox.
- Transformer, Direction, Interpolation, Rognage, Afficher l’aperçu d’image, Guides de sélection
-
![[Note]](images/note.png)
Note Ces options sont décrites dans Options communes des outils de transformation.
Note Le mode Transformer ne travaille que sur le calque actif. Pour agir sur l’ensemble des calques de l’image, utilisez Échelle et Taille de l’image .
Pour mettre à l’échelle un chemin, reportez-vous à Transformation d’un chemin.
- Conserver le rapport (Maj)
-
When you move a corner of the selection frame, this option will constrain the scale such as the Height/Width ratio of the layer will remain constant. Note that this doesn't work with border handles. Note also that it toggles the
 linking chain in the dialog.
- Autour du centre (Ctrl)
-
Si cette option est cochée, il est possible de mettre à l’échelle à partir du centre de façon radiale, si « Conserver le rapport » est cochée, sinon verticalement ou horizontalement.
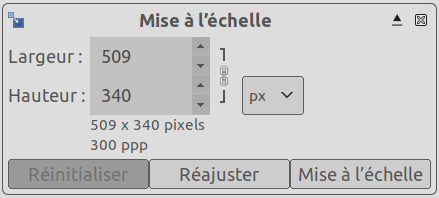
- Width, Height
-
Here, you can set Width and Height you want to give to the object. The default unit of measurement is pixel. You can change it by using the drop-down list. These values are also automatically changed when you drag handles in the image. If the associated
linking chain is broken, you can change Width and Height
separately.
- Bouton Réajuster
-
With this button you can reset the transform handles back to the original square shape, while keeping the current transformation and zoom level. This enables you to create more complex transformations by making the transformation in several steps.


