Lo strumento taglierino viene usato per tagliare o ridimensionare un'immagine o un livello. Questo strumento viene spesso usato per rimuovere bordi o per eliminare aree indesiderate consentendo di concentrarsi maggiormente sull'area di interesse. È anche utile se serve specificare una dimensione immagine che non corrisponde con le dimensioni originali..
To define the crop area click and drag with the mouse. A highlighted area will appear that shows the crop boundaries. To move the whole crop area, click in the middle and drag the rectangle. Resizing can be done by moving close to the borders. The mouse cursor will change and you can drag either one side, if you are in the middle, or two sides, if you are in a corner. While you are changing the drag area, the size of the cropped area and the aspect ratio will be shown in the status bar.
Quando il puntatore del mouse diventa un crocino in movimento, è possibile usare i tasti freccia per spostare il rettangolo di ritaglio. Mantenendo premuto il pulsante Maiusc di ottengono spostamenti multipli di 25 pixel.
To finalize cropping, click inside the crop rectangle or press the Enter key.
![[Nota]](images/note.png)
|
Nota |
|---|---|
|
By default the image canvas size isn't changed after cropping. The Tool Options of the Crop Tool have a setting Delete cropped pixels that can be checked to make sure the canvas size is also adjusted to the cropped area. |
![[Suggerimento]](images/tip.png)
|
Suggerimento |
|---|---|
|
You can use Guides to position the crop area. Make sure that the → option is checked. |
Ci sono diverse possibilità per attivare lo strumento:
-
From the main menu: → → .
-
Facendo clic sull'icona dello strumento
nel panello degli strumenti.
-
By pressing the Shift+C keyboard shortcut.
Quando si mantiene il clic sul rettangolo di ritaglio, le maniglie scompaiono e
-
mantenendo premuto il tasto Ctrl si commuta l'opzione Espandi dal centro.
-
Mantenendo premuto il tasto Maiusc si commuta invece l'opzione Fisso che rende alcune dimensioni inalterabili.
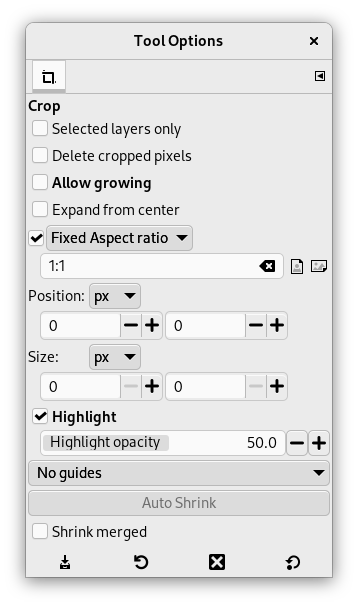
Normally, tool options are displayed in a window attached under the Toolbox as soon as you activate a tool. If they are not, you can access them from the main menu through → → which opens the option window of the selected tool. The available tool options can also be accessed by double clicking the corresponding tool icon in the Toolbox.
- Selected layers only
-
This option will make crop affect only the selected layers.
- Delete cropped pixels
-
When checked, the canvas size is adjusted to the cropped area. By default this is not checked, which means that after cropping the layers have been adjusted, but the canvas size is still the same. This is to make sure you don't remove anything by accident.
- Permetti ingrandimento
-
Questa opzione permette ai comandi di ritaglio o ridimensionamento di poter funzionare fuori dall'immagine (o livello) o anche fuori dalla superficie disegnabile. Con ciò è possibile dare la dimensione desiderata all'immagine risultante. La trasparenza viene usata se non c'è materiale da ritagliare.
Figura 14.100. Esempio i «permetti la crescita»
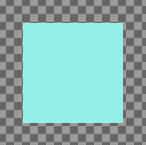
Un'immagine su una grande superficie disegnabile
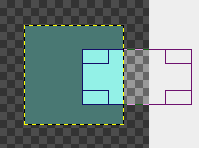
L'opzione è selezionata. Il rettangolo di ritaglio si estende oltre la superficie.

L'immagine risultante.
- Espandi dal centro
-
Quando quest'opzione è selezionata, il rettangolo di ritaglio si espande dal primo pixel su cui si ha fatto clic, preso come centro. È possibile commutare quest'opzione con il tasto Ctrl durante il disegno del rettangolo di ritaglio.
- Fisso
-
Con quest'opzione, il taglio rispetterà un rapporto di dimensioni fisso tra la larghezza e l'altezza.
-
Rapporto dimensioni: questa è l'impostazione predefinita. Durante il disegno del rettangolo di ritaglio, l'altezza e la larghezza vengono mantenute allo stesso rapporto che avevano nell'immagine originale.
-
Larghezza / Altezza: solo la larghezza o l'altezza rimane fissa. Il valore di questa dimensione può essere impostato nella casella di immissione testo sottostante; il valore predefinito è di 100 pixel.
-
Size: Both Width and Height will be fixed. Their values can be set in the text box below, in the form «150×100» for example. The crop rectangle will adopt these values as soon as you click the image. On the right, two buttons let you choose a (widthwise) or (upright) format for the crop rectangle.
-
- Posizione
-
These two text fields contain the current horizontal and vertical coordinates of the upper left corner of the selection. You can use these fields to adjust the selection position precisely.
- Dimensione
-
These two text fields contain the current width and height of the selection. You can use these fields to adjust the selection size precisely.
- Evidenzia
-
If you enable this option, the selected area is emphasized by a surrounding mask to make visual selection much easier.
L'opacità dell'area scura può essere impostata usando il cursore Evidenzia opacità.
- Guide
-
With this menu you can select the type of guides that is shown within the selection to make the creation of a selection easier, respecting Photo composition rules.
Six options are available:
-
No Guides
-
Righe centrali
-
Regola dei terzi
-
Regola dei quinti
-
Sezioni auree
-
Righe diagonali
-
- Auto Shrink
-
Il pulsante di autoriduzione cerca di localizzare un bordo, nel livello attivo, dal quale ricavare le dimensioni di ritaglio. Quest'opzione funziona bene solo con oggetti isolati e dai contrasti elevati con lo sfondo.
Figura 14.101. Auto Shrink example
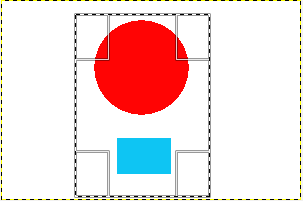
Un'immagine contenente un bordo netto ed un rettangolo di ritaglio.
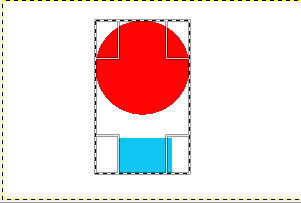
Dopo aver effettuato il clic sul pulsante di autoriduzione, il rettangolo di ritaglio è stato ridotto secondo i limiti dell'area dai bordi netti.
- Shrink merged
-
Quest'opzione lavora allo stesso modo, che si usi l'autoriduzione o no. Se abilitata, essa fa in modo di usare le informazioni provenienti da tutti i livelli visibili, piuttosto che prelevarle solamente dal livello attivo.
