裁剪图像的原因有很多;例如,让图像适合框架大小,去除一部分背景以强调主体等。有两种方法可以激活裁剪工具。单击工具箱中的
![]() 按钮,或使用图像窗口中的 → → 。这会更改光标并允许您点击并拖动矩形。工具箱中的按钮是访问任何工具的最简单方法。
按钮,或使用图像窗口中的 → → 。这会更改光标并允许您点击并拖动矩形。工具箱中的按钮是访问任何工具的最简单方法。
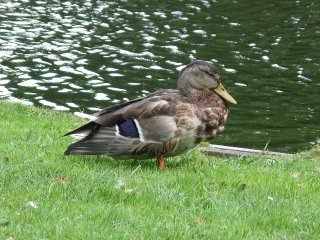
单击所需裁剪区域的一角并拖动鼠标以创建裁剪矩形。您不必精确,因为您可以稍后更改矩形的确切形状。
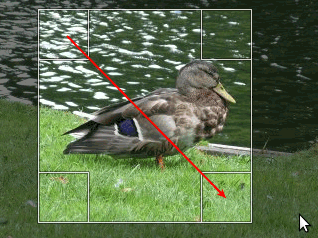
图 3.22. 用于裁剪的对话框
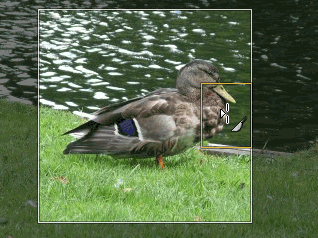
完成单击和拖动动作后,画布上会显示一个带有特殊区域的矩形。当光标移动到所选裁剪区域的不同区域时,光标会发生变化。然后,您可以拖动矩形的角或边以更改所选区域的尺寸。如上图所示,随着裁剪区域的大小调整,状态栏会显示尺寸和比例。在矩形内双击或按Enter完成裁剪。关于GIMP裁剪的更多信息, 请参见第 4.4 节 “剪裁”。
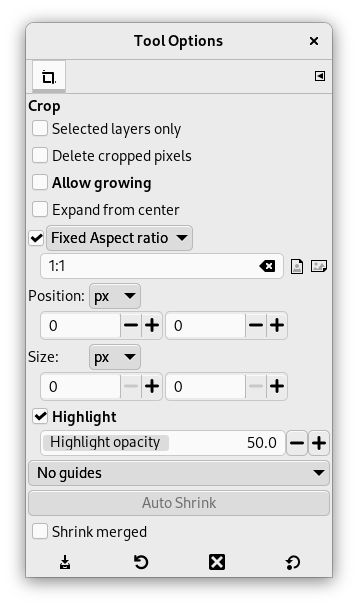
If you would like to crop the image in a specific aspect ratio, such as a square, make sure the tool options are visible ( → → ). In the Tool Options dockable, check the mark next to Fixed Aspect Ratio. Type the desired aspect ratio in the text field below, such as “1:1”.
You also have buttons to change the aspect from landscape to portrait. After you set the aspect ratio, drag one of the corners of the crop rectangle to update it. The rectangle changes to the chosen ratio, and when you drag it should maintain that ratio.


