In questa sezione si apprenderà come creare oggetti semplici con GIMP.
Cominciamo disegnando una linea retta. Il modo più semplice di creare una linea retta è usando il proprio strumento di disegno preferito, il mouse e la tastiera.
-
Creazione di una nuova immagine
Figura 7.31. Una nuova immagine
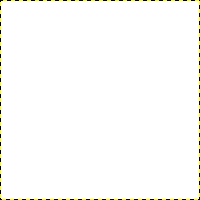
La finestra di dialogo mostra una nuova immagine riempita di uno sfondo bianco.
Create una nuova immagine.
-
Scegliete uno strumento
Selezionate uno strumento di disegno dal pannello strumenti, ad esempio lo strumento
 Matita o lo strumento
 Pennello.
 -
Selezionate un colore
Selezionate un colore di primo piano, assicurandosi che i colori di primo piano e di sfondo siano diversi.
-
Create un punto di inizio
Figura 7.32. L'inizio di una linea diritta
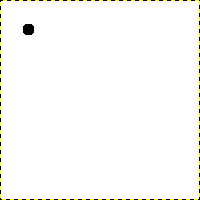
La finestra di dialogo mostra una nuova immagine con il primo punto che indica l'inizio di una retta. Il punto ha come colore di primo piano il nero.
La dimensione di questo punto rappresenta la dimensione corrente del pennello, che si può modificare nella finestra di dialogo del Pennello.
Creare un punto di inizio facendo clic sull'area della finestra immagine con il tasto sinistro del mouse. Dovrebbe apparire simile a Figura 7.31, «Una nuova immagine».
-
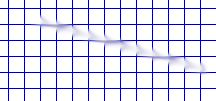
Disegno di una linea
Figura 7.33. La riga d'aiuto
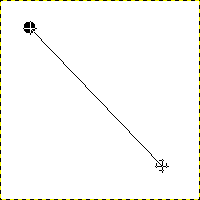
La schermata mostra la linea di aiuto che indica dove apparirà la linea finita.
Ora, tenere premuto il tasto
 Maiusc sulla tastiera e allontanare il mouse dal punto di partenza creato. Si osserverà una linea sottile che indica l'aspetto che avrà la linea.
 -
Finire la linea
Figura 7.34. La linea dopo il secondo clic
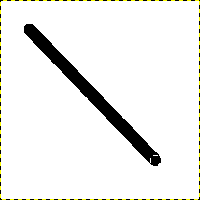
La linea creata appare nella finestra immagine dopo il disegno del secondo punto (o capo), mentre il tasto Maiusc è ancora premuto.
Se si è soddisfatti della direzione e della lunghezza della linea, fare di nuovo clic con il tasto sinistro del mouse per completarla. L'ultimo passaggio consiste nel rilasciare il tasto Maiusc. GIMP ora visualizzerà una linea retta.
Figura 7.35. Esempio I
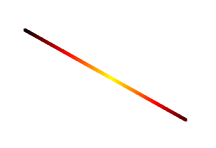
Impostare le dinamiche su «Colore da gradiente» e Opzioni colore su «Incandescent». In Opzioni di dissolvenza, impostare Ripetizione su «Troncata». A seconda delle dimensioni dell'immagine sottostante, si potrebbe voler modificare anche la lunghezza della dissolvenza.
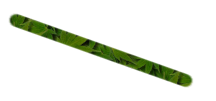
Selezionare lo strumento Clona e impostare la sorgente sul motivo «Maple Leaves» (N.d.T. Foglie d'Acero).
Figura 7.36. Esempio II
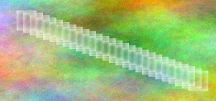
Use → → → to create a grid. Use the Smudge Tool to draw a line with a slightly larger brush.
Use → → → to create the cool plasma cloud. Use the Erase Tool with a square brush to draw a line.
Figura 7.37. Esempio III
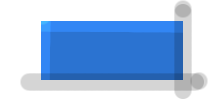
Usare lo strumento di selezione rettangolare per selezionare un rettangolo, quindi riempire la selezione con un colore azzurro. Selezionare lo strumento Scherma/Brucia. Impostare il tipo su Scherma e disegnare lungo il lato superiore e sinistro utilizzando un pennello di dimensioni appropriate. Impostare il tipo su Brucia e disegnare lungo il lato destro e inferiore.


