In this section, you will learn how to create simple objects in GIMP.
Let's begin by painting a straight line. The easiest way to create a straight line is by using your favorite brush tool, the mouse and the keyboard.
-
Create a New Image
Створити нове зображення.
-
Choose a Tool
Select a brush tool from the Toolbox, for example the
 Pencil tool or the
 Paintbrush tool.
-
Вибір кольору
Select a foreground color, but be sure that the foreground and background colors are different.
-
Create a Starting Point
Рисунок 7.32. The start of the straight line

The dialog shows a new image, with the first dot which indicates the start of the straight line. The dot has a black foreground color.
The size of this dot represents the current brush size, which you can change in the Brush Dialog.
Create a starting point by clicking on the image display area with the left mouse button. Your canvas should look similar to Рисунок 7.31, «Нове зображення».
-
Малювання прямої лінії
Рисунок 7.33. The helpline

The screenshot shows the helpline, which indicates how the finished line will look.
Now, hold down the
 Shift key on your
keyboard and move the mouse away from the starting point you
created. You'll see a thin line indicating how the line will
look.
Shift key on your
keyboard and move the mouse away from the starting point you
created. You'll see a thin line indicating how the line will
look.
-
Finish the Line
Рисунок 7.34. The line after the second click

The line created appears in the image window after drawing the second point (or end point), while the Shift key is still pressed.
If you're satisfied with the direction and length of the line, click the left mouse button again to finish the line. The last step is to let go of the Shift key. GIMP displays a straight line now.

Рисунок 7.35. Приклад І
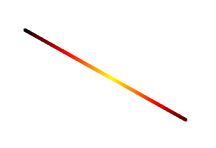
Set Dynamics to «Color From Gradient» and set Color Options to «Incandescent». Under Fade Options, set Repeat to «Truncate». Depending on the size of your underlying image, you might want to change the Fade length as well.
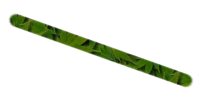
Select the Clone tool and set the source to «Maple Leaves» pattern.
Рисунок 7.36. Приклад ІІ
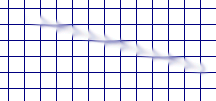
Use → → → to create a grid. Use the Smudge Tool to draw a line with a slightly larger brush.
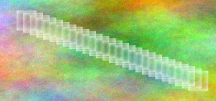
Use → → → to create the cool plasma cloud. Use the Erase Tool with a square brush to draw a line.
Рисунок 7.37. Приклад ІІІ
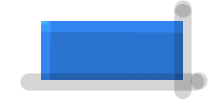
Use the rectangle select tool to select a rectangle, and then fill the selection with a light blue color. Select the Dodge/Burn tool. Set the type to Dodge and paint along the top and left side using an appropriately sized brush. Set the type to Burn and paint along the right and bottom.


