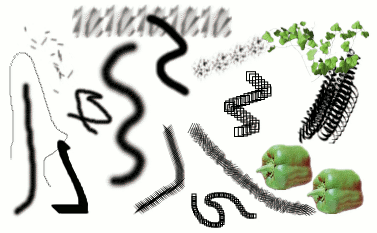
Pav. 7.15. Teptuko potėpių pavyzdys

A number of examples of brushstrokes painted using different brushes from the set supplied with GIMP. All were painted using the Paintbrush tool.
A brush is a pixmap or set of pixmaps used for painting. GIMP includes a set of Paint Tools, which not only perform operations that you would normally think of as painting, but also operations such as erasing, copying, smudging, lightening or darkening, etc. All of the paint tools, except the ink tool, use the same set of brushes. The brush pixmaps represent the marks that are made by single „touches“ of the brush to the image. A brush stroke, usually made by moving the pointer across the image with the mouse button held down, produces a series of marks spaced along the trajectory, in a way specified by the characteristics of the brush and the paint tool being used.
Brushes can be selected by clicking on an icon in the Brushes dialog. GIMP's current brush is shown in the Brush/Pattern/Gradient area of the Toolbox. Clicking on the brush symbol there is one way of activating the Brushes dialog.
When you install GIMP, it comes with a number of basic brushes, plus a few bizarre ones that serve mainly to give you examples of what is possible (i. e., the "green pepper" brush in the illustration). You can also create new brushes, or download them and install them so that GIMP will recognize them.
GIMP can use several different types of brushes. All of them, however, are used in the same way, and for most purposes you don't need to worry about the differences when you paint with them. Here are the available types of brushes:
- Paprasti teptukai
-
Most of the brushes supplied with GIMP fall into this category. They are represented in the Brushes dialog by grayscale pixmaps. When you paint using them, the current foreground color (as shown in the Color Area of the Toolbox) is substituted for black, and the pixmap shown in the Brushes dialog represents the mark that the brush makes on the image.
To create such a brush: create a grayscale image in gray levels, where black is fully visible, white is transparent, with gray levels in between. Do not use transparency for these brushes. Save it with the .gbr extension. Click on the Refresh button in the Brushes Dialog to get it in preview without it being necessary to restart GIMP.
- Spalvoti teptukai
-
Brushes in this category are represented by colored images in the Brushes dialog. They can be pictures or text. When you paint with them, the colors are used as shown; the current foreground color does not come into play. Otherwise they work the same way as ordinary brushes.
To create such a brush, create a small RGBA image:
Select → from the main menu.
In the Advanced Options, set for example the Color space to RGB color and set Fill with to Transparency.
Draw your image. Contrary to grayscale brushes, transparent areas here will be drawn transparent.
Select → from the main menu to first save your image as an
.xcffile to keep its properties.Select → from the main menu to export the image as a brush with the
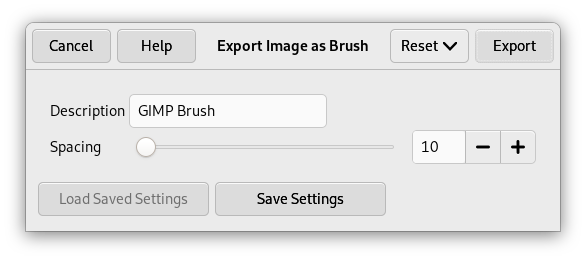
.gbrextension.In the Brushes Dialog, click on the button
.
Your brush appears among the other brushes. You can use it immediately, without restarting GIMP.
![[Patarimas]](images/tip.png)
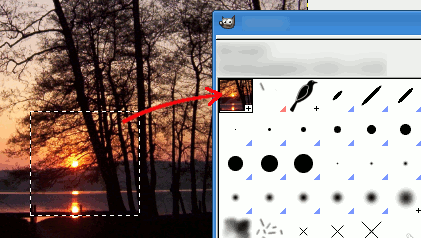
Patarimas When you do a Copy or a Cut on a selection, you see the contents of the clipboard (that is the selection) at the first position in the brushes dialog. And you can use it for painting.
- Paveikslėlio žarnos / paveikslėlių vamzdžiai
-
Brushes in this category can make more than one kind of mark on an image. They are indicated by small red triangles at the lower right corner of the brush symbol in the Brushes dialog. They are sometimes called "animated brushes" because the marks change as you trace out a brushstroke. In principle, image hose brushes can be very sophisticated, especially if you use a tablet, changing shape as a function of pressure, angle, etc. These possibilities have never really been exploited, however; and the ones supplied with GIMP are relatively simple (but still quite useful).
You will find an example on how to create such brushes in Animated brushes
- Parametriniai teptukai
-
Šie teptukai sukurti naudojant Teptukų rengyklę, leidžiančia sugeneruoti įvairias teptukų formas, naudojantis paprasta grafine sąsaja. Parametriniai teptukai turi naudingą ypatybę: galima keisti jų dydį. Nustatymų dialoge galima nurodyti, kad paspaudus klavišą arba pasukus pelės ratuką, dabartinis teptukas padidėtų arba sumažėtų, jeigu tai yra parametrinis teptukas.
Now, all brushes have a variable size. In fact, in the option box of all painting tools there is a slider to enlarge or reduce the size of the active brush. You can do this directly in the image window if you have set correctly your mouse wheel; see Varying brush size.
In addition to the brush pixmap, each GIMP brush has one other important property: the brush Spacing. This represents the distance between consecutive brush-marks when a continuous brushstroke is painted. Each brush has an assigned default value for this, which can be modified using the Brushes dialog.
![[Pastaba]](images/note.png)
|
Pastaba |
|---|---|
|
GIMP can use MyPaint brushes. Please refer to Skyrius 3.11, „MyPaint Brush“ for more information. |
![[Pastaba]](images/note.png)
|
Pastaba |
|---|---|
|
There is a quick method to add a new brush: Skyrius 5.4, „Greitas teptuko sukūrimas“. |
Norėdami pridėti naują teptuką, po to kai jį sukūrėte arba atsisiuntėte, jį reikės išsaugoti formatu, kurį gali naudoti GIMP. Teptuko failą reikia padėti programos GIMP teptukų paieškos kelyje, kad kad GIMP galėtų jį indeksuoti ir rodyti teptukų dialoge. Galite paspausti mygtuką , kuris iš naujo indeksuoja teptukų aplanką. Teptukams GIMP naudoja tris failų formatus:
- GBR
-
The
.gbr("gimp brush") format is used for ordinary and color brushes. You can convert many other types of images, including many brushes used by other programs, into GIMP brushes by opening them in GIMP and saving them with file names ending in.gbr. This brings up a dialog box in which you can set the default Spacing for the brush.A technical specification of the GBR file format can be found on developer.gimp.org.
- GIH
-
The
.gih("gimp image hose") format is used for animated brushes. These brushes are constructed from images containing multiple layers: each layer may contain multiple brush-shapes, arranged in a grid. When you save an image as a.gihfile, a dialog comes up that allows you to describe the format of the brush. See Skyrius 5.2, „Creating animated brushes“ for more information about the dialog.A technical specification of the GIH file format can be found on developer.gimp.org.
- VBR
-
Formatas
.vbryra naudojamas parametriniams teptukams, t. y., teptukams, sukurtiems teptukų rengykle. Iš tikrųjų nėra jokio kito būdo gauti šio formato failus. - MYB
-
The
.mybformat is used for MyPaint brushes. Please refer to Skyrius 3.11, „MyPaint Brush“ for more information.
Kad teptukas būtų prieinamas, padėkite jį viename iš GIMP teptukų paieškos kelyje esančių aplankų. Pagal numatytuosius parametrus, teptuko paieškos kelyje yra 2 aplankai: sistemos brushes aplankas, kurio naudoti ar keisti neturėtumėte, ir jūsų asmeniniame GIMP aplanke esantis brushes aplankas. Nustatymų dialoge esančiame puslapyje Teptukų aplankai galite pridėti paieškos kelyje naujus aplankus. Bet koks teptųkų paieškos kelyje esančiame aplanke padėtas teptukas kitą kartą paleidus programą GIMP bus rodomas Teptukų dialoge, arba kai Teptukų dialoge spustelėsite mygtuką .
![[Pastaba]](images/note.png)
|
Pastaba |
|---|---|
|
Kai naudodamiesi Teptukų rengykle sukuriate naują parametrinį teptuką, jis automatiškai išsaugomas jūsų asmeniniame |
Yra ne viena žiniatinklio svetainė, iš kur galite atsisiųsti GIMP teptukus. Užuot pateikę nuorodų, kurios greitai gali būti pasenę, sąrašą, mes jums patariame savo mėgstamiausioje paieškos svetainėje įvesite „GIMP brushes“. Taip pat yra daug kitų piešimo programų teptukų. Kai kuriuos galima lengvai konvertuoti į GIMP teptukus, kai kuriems reikia specialių konvertavimo įrankių, o kai kurių neįmanoma konvertuoti visai. Į pastarąją kategoriją patenka dauguma įmantrių procedūrinių teptukų. Jeigu norite žinoti, paieškokite žiniatinklyje, o jeigu nieko nerandate, paklauskite specialisto.


