To access these tools, select → from the main menu.
The GIMP Toolbox includes fourteen “paint tools”. By default they are shown together in five groups, but this can be disabled in Toolbox Preferences by unchecking Use tool groups.
Figura 14.27. The Paint Tools in the Toolbox
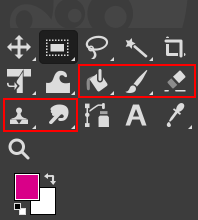
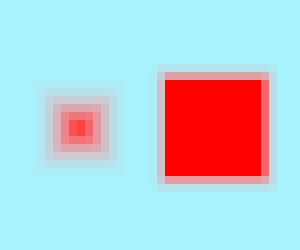
The default view groups similar tools together. The paint tools groups are inside the red square.
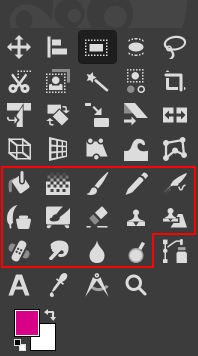
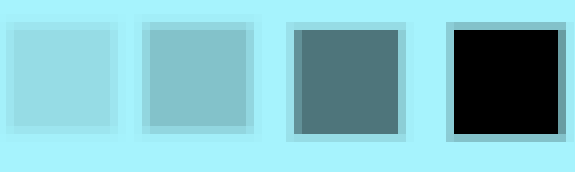
The paint tools in the toolbox in ungrouped view inside the red area.
The feature they all have in common is, that all of them are used by moving the pointer across the image display, creating brush-strokes. Five of them behave like the intuitive notion of “painting” with a brush. Pencil, Paintbrush, Airbrush, and MyPaint brush are called “basic painting tools” or brush tools.
-
The Pencil Tool.
-
The Paintbrush Tool.
-
The Airbrush Tool.
-
The Ink tool.
-
The MyPaint Brush Tool.
As outras ferramentas usam o pincel para modificar uma imagem de alguma forma diferente do que seria pintar, propriamente dito:
-
the Bucket Fill Tool fills with color or a pattern;
-
the Gradient Tool fills with gradients;
-
the Eraser Tool erases;
-
the Clone Tool copies from a pattern, or image;
-
the Heal Tool corrects small defects;
-
the Perspective Clone Tool copies into a changed perspective;
-
the Blur/Sharpen Tool blurs or sharpens;
-
the Smudge Tool smears;
-
and the Dodge/Burn Tool lightens or darkens.
As vantagens de usar o GIMP com uma mesa digitalizadora (tablet) ao invés de um mouse propriamente ficam mais claras com as ferramentas de pincel do que com qualquer outra: o ganho em controle fino é imensurável. Essas ferramentas também possuem opções especiais de “sensibilidade de pressão” que apenas são usáveis com uma mesa digitalizadora (tablet). Se você estiver corrigindo fotos, tudo bem usar o mouse. Se você for um ilustrador, considere seriamente adquirir um tablet num futuro próximo, se já não tiver um.
Além do método mais comum de “por as mãos na massa”, é possível aplicar as ferramentas de pintura de forma automatizada, criando uma seleção ou vetor e então “contorná-la”. Você pode contornar com qualquer uma das ferramentas de pintura, incluindo as ferramentas que não são padrão como a borracha, ferramenta de borrar, etc., e qualquer opção de configuração que você escolher para a ferramenta será aplicada. Veja a seção Contornar para maioresinformações.
- Ctrl
-
Holding down the Ctrl key has a special effect on every paint tool. For the Pencil, Paintbrush, Airbrush, Ink, and Eraser, it switches them into “color picker” mode, so that clicking on an image pixel causes GIMP's foreground to be set to the active layer's color at that point (or, for the Eraser, GIMP's background color). For the Clone tool, the Ctrl key switches it into a mode where clicking sets the reference point for copying. For the Blur/Sharpen tool, the Ctrl key switches between blur and sharpen modes; for the Dodge/Burn tool, it switches between dodging and burning.
- Shift
-
Pressionar a tecla Shift possui o mesmo efeito na maioria das ferramentas de pintura: ela coloca a ferramenta no modo de linha reta. Para criar uma linha reta com uma das ferramentas de pintura, primeiro clique no ponto de inicio, e então pressione a tecla Shift. Enquanto você pressioná-la, verá uma fina linha conectando o ponto clicado anteriormente com o local atual do ponteiro. Se clicar novamente, enquanto continua a pressionar a tecla Shift, uma linha reta será desenhada. Você pode continuar esse processo para criar uma série de segmentos de linhas conectadas.
- Ctrl+Shift
-
Pressionar ambas as teclas coloca a ferramenta no modo de linha reta forçada. Isso é similar ao efeito da tecla Shift pressionada sozinha; exceto que a orientação da linha é forçada a ao ângulos mais próximo que seja múltiplo de 15 graus. Use isso se deseja criar linhas perfeitamente horizontais, verticais ou diagonais.
Muitas opções da ferramenta são compartilhadas por diversas ferramentas de pintura: elas estão descritas aqui. Opções que se aplicam apenas a uma ferramenta específica, ou a um pequeno número de ferramentas, estão descritas nas seções dedicadas a essas ferramentas.
- Modo
-
The Mode drop-down list provides a selection of paint application modes. As with the opacity, the easiest way to understand what the Mode setting does is to imagine that the paint is actually applied to a layer above the layer you are working on, with the layer combination mode in the Layers dialog set to the selected mode. You can obtain a great variety of special effects in this way. The Mode option is only usable for tools that can be thought of as adding color to the image: the Pencil, Paintbrush, Airbrush, Ink, and Clone tools. For the other paint tools, the option is always disabled. A list of modes can be found in Seção 2, “Modos de Camada”.
Nessa lista, alguns dos modos são específicos e são descritos abaixo.
- Opacidade
-
O seletor de opacidade define o nível de transparência para a operação do pincel. Para entender como isso funciona, imagine que ao invés de alterar a camada ativa, a ferramenta cria uma camada de transparência acima da camada ativa e atua nessa camada. Alterar a opacidade no opções da ferramenta possui o mesmo efeito que alterar a opacidade na janela de camadas na situação citada anteriormente. Ela controla a “intensidade” de todas as ferramentas de pintura, não apenas aquelas desenham na camada ativa. No caso da borracha, isso pode ser um pouco confuso: como a opacidade determina a força da ferramenta, acontece que quanto maior a “opacidade”, maior é a transparência que você obtém.
- Pincel
-
O pincel determina o quanto da imagem é afetada pela ferramenta, e como ela é afetada, quando você traça uma pincelada com o ponteiro. O GIMP permite usar diversos tipos de pincéis, que são descritos na seção Pincel. As mesmas opções de pincel estão disponíveis para todas as ferramentas de pintura exceto a ferramenta de tinta, que usa um tipo único de pincel gerado pelo programa. As cores do pincel apenas aparecem em ferramentas em que fazem sentido: nas ferramentas de lápis, pincel, e aerógrafo. Para outras ferramentas de pintura, apenas a distribuição de intensidade de um pincel é relevante.
- Tamanho
-
Essa opção permite modificar precisamente o tamanho de um pincel. Você pode usar as teclas “[” e “]” para variar o tamanho do pincel em mais ou menos 1 pixel, mesmo estando com a imagem em foco. Se você clicar nesse controle, pode usar as teclas Page-Up e Page-Down para variar entre + e - 10,00. Você pode obter o mesmo resultado se você definir corretamente a rodinha do mouse nas preferências. Veja Como alterar o tamanho do pincel
- Proporção
-
Isso determina a proporção entre a altura e largura do pincel. O seletor varia de -20,00 até 20,00 com o valor padrão definido em 0,00. Um valor negativo de 0,00 a -20 irá estreitar a altura do pincel enquanto que valores positivos entre 0,00 e 20,00 indicam uma taxa de estreitamento da largura do pincel.
- Ângulo
-
This option makes the brush turn round its center, clock-wise. This is visible if the brush is not circular or made from a rotated figure.
- Espaçamento
-
This option sets the distance between the brush marks in a stroke.
- Dureza
-
Modifies the size of the brush's hard center.
- Força
-
Modifies the “gain” of the brush: gain is a secondary Opacity multiplier that can increase or decrease the strength of the brush during its operation (distinct from the Opacity setting, which is applied to the operation as a whole). Force values below 50% reduce the brush's effect relative to its preview shown in the Tool Options; values above 50% increase the effect (up to 2x at Force=100%) instead.
For standard brush types (i.e. parametric brushes created by the Brush Editor), Force values above 50% effectively expand the opaque center of that brush similar to (but more subtle than) increasing the Hardness of that brush. (The exact relationship between Force and Hardness in this case is complicated.)
For other (raster or image based) brush types, Force values above 50% may show little to no effect depending on the specific brush used, as these brushes often contain maximum opacity to begin with (which cannot be increased further, only decreased).
- Enable dynamics
-
When you enable this option multiple dynamics related settings will appear below it. Brush dynamics let you map different brush parameters to several input dynamics. They are mostly used with graphic tablets, but some of them are also usable with a mouse.
Você pode ler mais sobre dinâmicas em Dinâmicas
When stroking paths and selections using a paint tool there is an option to select “Emulate brush dynamics”. That means that when you stroke, brush pressure and velocity are varying along the length of the stroke. Pressure starts with zero, ramps up to full pressure and then ramps down again to no pressure. Velocity starts from zero and ramps up to full speed by the end of the stroke.
- Opções de dinâmicas
-
Essas opções são descritas em Opções de dinâmicas
- Aplicar espalhamento
-
Você conhece o “espaçamento” em pinceladas: as pinceladas são produzidas a partir de marcas sucessivas do pincel que, por estarem muito próximas, se parecem com uma linha continua. Aqui, ao invés das marcas de pincéis estarem alinhadas na pincelada, elas ficam espalhadas, próximas do traço. Você pode definir a distância do espalhamento com o seletor de .
Figura 14.32. Exemplo de “espalhamento”
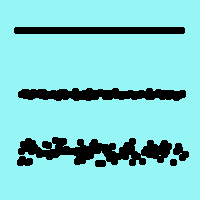
De cima para baixo: sem espalhamento, espalhamento = 1, espalhamento = 4.
O espalhamento também está disponível no editor de dinâmicas de pintura, onde você pode vincular a quantidade de espalhamento a vários fatores durante a pintura, como velocidade, direção e pressão, entre outros.
- Pincelada suave
-
Essa opção não afeta a representação da pincelada mas sua “forma”. Ela altera as oscilações da linha que você está desenhando, o que torna desenhar com um mouse mais fácil.
Quando essa opção está marcada, duas áreas de configuração aparecem, Qualidade e Peso. Você pode alterar os valores padrão para adaptá-los a sua habilidade.
Um valor alto para o peso torna a pincelada mais firme.
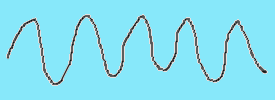
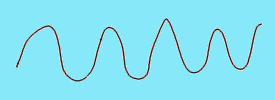
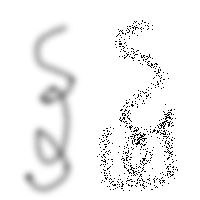
Tabela 14.2. “Smooth Stroke” example trying to draw with the mouse
“Smooth Stroke” setting
Straight line
Sine curve
Unchecked 
Default 
Maximum 
- Lock brush to view
-
When you are working on an image that is bigger (in pixels) than your screen, you have to zoom in and out a lot. This option allows a very natural "iterative refinement" process with no need to repeatedly ask the application to change brush size as you go between the broad strokes and the detailing.
If the brush size is relative to the canvas (option unchecked), zooming in makes the brush zoomed also and it appears larger (takes up more pixels on the screen). If you're working with a 300 pixels radius brush and you zoom in from 12% to 100%, the brush is now half the size of your screen! So you have to shrink the brush back down.
If the brush size is relative to the screen (option checked), then when you zoom in, the size of the displayed brush doesn't change, it looks smaller and so you can work on tiny details.
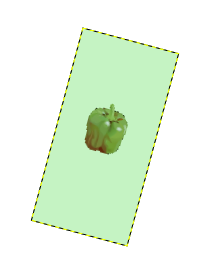
Figura 14.33. “Lock brush to view” example
An image displayed at 50% zoom so the whole image is visible. The “Lock brush to view” option is not checked and the brush size is set to 100 pixels high in the toolbox.
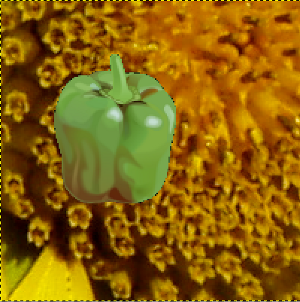
Part of the image at 200% zoom. The “Lock brush to view” option is not checked and the brush size is set to 100 pixels high in the toolbox. We paint with the pencil and the brush stroke of the selected pepper brush is displayed as 200 pixels high due to the zoom.
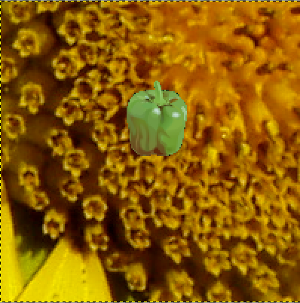
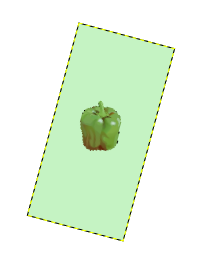
Part of the image at 200% zoom. The “Lock brush to view” option is checked and the brush size is set to 100 pixels high in the toolbox. We paint with the pencil and the brush stroke of the selected pepper brush is displayed as 100 pixels high due to the setting.
"Lock brush to view" can also be used to lock brush to view rotation:
Figura 14.34. “Lock brush to view” rotation example
The “Lock brush to view” option is checked and we rotate the view 15° clockwise. The brush stroke rotates with the view.
The “Lock brush to view” option is not checked and we rotate the view 15° clockwise. The brush stroke does not rotate with the view.
- Incremental
-
Applies the effect incrementally as the mouse pointer moves.
The incremental checkbox does not seems to work as everyone expect. If it is deactivated (the default value) the maximum effect of a single stroke is determined by the opacity set in the opacity slider. If the opacity is set to less than 100, moving the brush over the same spot will increase the opacity if the brush is lifted in the meantime. Painting over with the same stroke has no such effect. If Incremental is active the brush will paint with full opacity independent of the slider's setting. This option is available for all paint tools except those which have a “rate” control, which automatically implies an incremental effect. See also Seção 2, “Modos de Camada”.
- Expand Layers
-
When enabled, this automatically enlarges the layer when painting outside the borders of the layer. If it is enabled, several additional settings appear below it.
Note that this doesn't allow you to extend a layer beyond the size of the image canvas. To change the size of the canvas see Canvas Size.
- Amount
-
The amount of pixels to add in the direction you are painting.
- Fill with
-
Here you can select how the new expanded area of the layer is filled. These are the same choices as in the New Layer Dialog.
- Fill Layer Mask With
-
If the layer you are painting on has a layer mask, that mask will also be extended. This option gives you a choice how to fill the new area of the layer mask. You have a choice between White (full opacity) and Black (full transparency).
Os seguintes exemplos demonstram algum dos modos de pintura do GIMP:
- Dissolver
-
Figura 14.35. Exemplo do modo dissolver
Duas pinceladas criadas com o aerógrafo, usando o mesmo pincel circular ondulado. Esquerda: modo normal. Direita: Modo dissolver
Para qualquer ferramenta de pintura com opacidade abaixo de 100%, esse modo muito útil não desenha transparência, mas usa o valor de transparência para determinar a possibilidade de aplicar a pintura em cada pixel. Isso pode gerar ótimas texturas de pontos para pinceladas ou preenchimento.
Figura 14.36. Pintando no modo dissolver
Essa imagem possui apenas a camada de fundo e nenhum canal alfa. A cor de fundo é a sky blue (céu azul). Três pinceladas com o lápis e várias opacidades: 100%, 50%, 25%. Pixels na cor de frente ficam espalhados ao longo da pincelada.
- Atrás
-
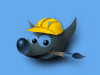
Figura 14.37. Exemplo de modo de camada “Atrás”
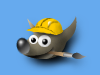
O Wilber atrás de uma camada de fundo azul
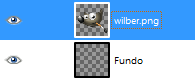
Layers Dialog
Preenchido com textura
Esse modo aplica pintura apenas nas áreas transparentes da camada: quando menor a opacidade, mais tinta é aplicada. Inclusive, pintar áreas opacas não gera efeito nenhum; pintar áreas transparentes têm o mesmo efeito que no modo normal. O resultado é sempre um aumento na opacidade. Claro que nenhum desses casos tem qualquer resultado em uma camada que não possua um canal alfa.
In the above example image, Wilber is on the top layer, surrounded by transparency. The lower layer is solid light blue. The Bucket Fill Tool was used, with the Fill whole selection option checked and the entire layer was selected. A pattern was used to paint with the Bucket Fill tool.
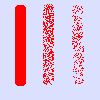
Figura 14.38. Pintando no modo “Atrás”

This image has two layers. The upper layer with two blue stripes is active. We paint three vertical brush strokes in red color with the pencil tool at 100%, 50%, 25% transparency (from left to right): only transparent or semi-transparent pixels of the layer are painted.

Resulting image.
- Apagar cor
-
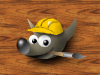
Figura 14.39. Exemplo do modo de camada “Apagar cor”
O Wilber atrás de uma camada de fundo azul
Cor de frente branca apagada
This mode erases the foreground color, replacing it with partial transparency. It acts like the Color to Alpha filter, applied to the area under the brushstroke. Note that this only works on layers that possess an alpha channel; otherwise, this mode is identical to Normal.
No exemplo de imagem acima, a cor da ferramenta de preenchimento era branco, com isso partes brancas do Wilber foram apagadas e o fundo azul ficou a mostra.
This image below has three horizontal stripes and has only one layer, the background layer. Background color is sky blue. We add three vertical brush strokes with the pencil tool:
-
On the left, a vertical brush stroke with the exact color of the blue stripe: only this blue color is erased.
-
In the middle, a vertical brush stroke with the exact color of the red area: only this red color is erased, whatever its transparency. Erased areas are made transparent.
-
On the right, a vertical brush stroke with the sky blue color of the layer background: only this color is erased.
Figura 14.40. Pintando no modo “Apagar cor”
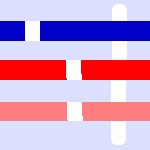
Vertical brush strokes painted in blue (on the left), in red (in the middle), in the background color (on the right).
-
Usuários avançados podem estar interessados em saber que as ferramentas de pintura na verdade operam no nível de sub-pixel, com a finalidade de evitar resultados com aparência serrilhada. Uma das consequências disso é que mesmo que você esteja trabalhando com um pincel de bordas duras, como um dos pincéis de círculo, os pixels da borda da pincelada serão afetados apenas parcialmente. Se você precisa de efeitos de tudo ou nada (que podem ser necessários para obter uma boa seleção, ou para cortar e colar, ou para trabalhar num nível de zoom alto o bastante para trabalhar em pixel por pixel), use a ferramenta de lápis, que faz com que todos os pincéis sejam completamente duros e desabilita o anti-serrilhamento em sub-pixel.


