Tabla de contenidos
Probablemente se ha encontrado en diversas ocasiones con la necesidad de ubicar algo en una imagen con mucha precisión, y ha caído en la cuenta que no es fácil hacerlo con el ratón. A menudo puede obtener mejores resultados empleando las teclas de desplazamiento del teclado (que mueven el objeto en cuestión un píxel cada vez o 25 píxeles si se mantiene presionada la tecla Mayús), pero GIMP además proporciona otras dos utilidades para hacer el posicionado más fácil: las rejillas y las guías.
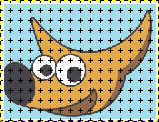
Each image has a grid. It is always present, but by default it is not visible until you activate it by toggling → in the main menu. If you want grids to be present more often than not, you can change the default behavior by checking Show grid in the Image Windows Appearance page of the Preferences dialog. (Note that there are separate settings for Normal Mode and Fullscreen Mode.)
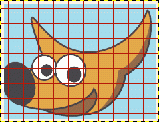
The default grid appearance, set up when you install GIMP, consists of solid lines, spaced every 10 pixels both vertically and horizontally. You can customize the default grid using the Default Image Grid page of the Preferences dialog. If you only want to change the grid appearance for the current image, you can do so by choosing → from the main menu: this brings up the Configure Grid dialog.
Not only can a grid be helpful for judging distances and spatial relationships, it can also permit you to align things exactly with the grid, if you toggle → in the main menu: this causes the pointer to "warp" perfectly to any grid line located within a certain distance. You can customize the snap distance threshold by setting "Snap distance" in the Snapping Behavior page of the Preferences dialog, but most people seem to be happy with the default value of 8 pixels. (Note that it is perfectly possible to snap to the grid even if the grid is not visible.)
![[Nota]](images/note.png)
|
Nota |
|---|---|
|
To create a grid that is actually part of the image, use the Grid plug-in. |
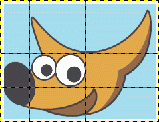
Además de la rejilla de la imagen, GIMP también proporciona un tipo de ayuda de posicionamiento más flexible: las guías. Son líneas verticales y horizontales que puede mostrar, de manera temporal, sobre una imagen mientras trabaja en ella.
To create a guide, simply click on one of the rulers in the image window and pull out a guide, while holding the mouse pressed. The guide is then displayed as a blue, dashed line, which follows the pointer. As soon as you create a guide, the “Move” tool is activated and the mouse pointer changes to the Move icon.
También puede crear una guía con el comando Guía nueva, que le permite situar la guía con precisión sobre la imagen, el comando Guía nueva (por porcentaje) o el comando Guías nuevas desde la selección.
Puede crear tantas guías como desee, y situarlas donde quiera. Para mover una guía después de haberla creado, active la herramienta mover de la caja de herramientas (o presione la tecla M), y entonces podrá pulsar y arrastrar la guía; pulse y arrastre la intersección de dos guías para moverlas juntas. Para eliminar una guía, simplemente arrástrela fuera de la imagen. Manteniendo presionada la tecla Mayús, puede mover todo excepto una guía, y así usar las guías como una utilidad de alineamiento efectiva.
El comportamiento de la guías dependen del modo Mover (afectar) de la herramienta “Mover”. Cuando se selecciona el modo Capa, el puntero del ratón se convierte en una mano pequeña tan pronto como se acerca a una guía. Entonces la guía se activa y se vuelve roja y puede mover la guía o eliminarla devolviéndola a la regla. Si se selecciona el modo Selección, puede situar una guía pero después no podrá moverla.
As with the grid, you can cause the pointer to snap to nearby guides, by toggling → in the main menu. If you have a number of guides and they are making it difficult for you to judge the image properly, you can hide them by toggling → . It is suggested that you only do this momentarily, otherwise you may get confused the next time you try to create a guide and don't see anything happening.
If it makes things easier for you, you can change the default behavior for guides in the Image Windows Appearance page of the Preferences dialog. Disabling Show guides is probably a bad idea, though, for the reason just given.
Puede quitar todas las guías con el comando → → .
![[Nota]](images/note.png)
|
Nota |
|---|---|
|
Another use for guides: the Slice Using Guides plug-in can use guides to slice an image into a set of sub-images. |


