In GIMP, a pattern is a small image used to fill areas by placing copies of side by side. See the Patterns section for basic information on patterns and how they can be created and used.
Juos galite naudoti su įrankiais Užpildymas ir Klonavimas bei komanda Užpildyti raštu.
The „Patterns“ dialog is used to select a pattern, by clicking on it in a list or grid view: the selected pattern will then be shown in the Brush/Pattern/Gradient area of the Toolbox. A few dozen more or less randomly chosen patterns are supplied with GIMP, and you can easily add new patterns of your own.
This dialog is a dockable dialog; see the section Skyrius 2.3, „Dialogai ir dokai“ for help on manipulating it.
You can access it:
-
From the Toolbox, by clicking on the pattern symbol in the Brush/Pattern/Gradient area (if you have checked the „Show active brush, pattern and gradient“ option in the toolbox preferences).
-
from the main menu: → → ;
-
from the Tab menu in any dockable dialog by clicking the tab menu button
and selecting → .
-
From the Tool Options dialog of the Clone tool and the Bucket Fill tool, by clicking on the pattern source button, you get a pop-up with similar functionality that permits you to quickly choose a pattern from the list; if you clic on the Bucket Fill button present on the right bottom of the pop-up, you open the real pattern dialog. Note that, depending on your Preferences, a pattern selected with the pop-up may only apply to the currently active tool, not to other paint tools. See the Tool Option Preferences section for more information.
- Tinklelio / sąrašo veiksenos
-
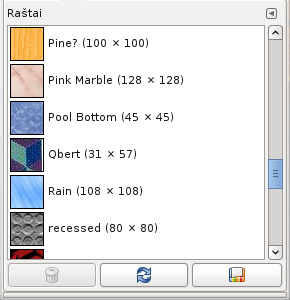
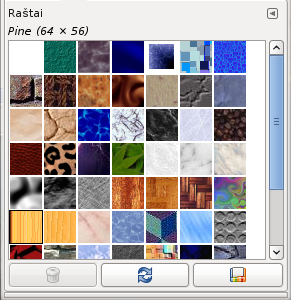
Kortelės meniu galite pasirinkti tarp ir . Tinklelio veiksenoje raštai yra išdėstyti stačiakampiame masyve, kuriame vienu metu galima matyti daug raštų. Sąrašo veiksenoje raštai yra išdėstyti sąraše, šalia parašyti jų pavadinimai.
![[Patarimas]](images/tip.png)
Patarimas Nepriklausomai nuo tikro rašto dydžio visi raštai dialoge yra rodomi tokio pat dydžio. Todėl naudojant didesnius raštus dialoge rodoma tik maža to rašto dalis – nesvarbu ar dialoge bus rodomas tinklelio, ar sąrašo rodinys. Norėdami pamatyti visą rašą, paprasčiausiai spustelėkite norimą gradientą ir palaikykite paspaudę pelės mygtuką.
![[Pastaba]](images/note.png)
Pastaba Kortelės meniu esanti parinktis Peržiūros dydis leidžia pakeisti raštų peržiūrų dydį.
- Raštų dialogo naudojimas (tinklelio veiksena)
-
Viršuje rodomas dabar pasirinktų raštų pavadinimas ir jo matmenys pikseliais.
Centre rodomas visų prieinamų raštų tinklelio rodinys, kuriame dabar pasirinktas raštas yra apibrauktas. Spustelėjus vieną iš jų, jis nustatomas dabartiniu GIMP raštu ir yra rodomas įrankinės Teptukų / Raštų / Gradientų srityje.
- Raštų dialogo naudojimas (sąrašo rodinys)
-
Šiame rodinyje vietoje tinklelio rodomas raštų sąrašas, rodant kiekvieno rašto pavadinimą ir dydį. Spustelėjus sąraše raštą jis nustatomas dabartiniu GIMP raštu, kaip ir tinklelio rodinyje.
Jeigu du kartus spustelėsite rašto pavadinimą, galėsite jį redaguoti. Atminkite, kad leidžiama pervadinti tik jūsų pačių pridėtus raštus, o ne platinamus kartu su GIMP. Jeigu pakeisite pavadinimą, kurio neleidžiama keisti, vos tik paspausite klavišą Enter arba suaktyvinsite kitą valdiklį, bus grąžintas ankstesnis pavadinimas.
Visa kita Sąrašo rodinyje veikia taip pat kaip ir Tinklelio rodinyje.
- Mygtukai
-
The button bar at the bottom offers the following functionality:
-
Duplicate Pattern
-
Pressing this button make a copy of the current pattern. It will have the same name as the original but with „copy“ added to it.
-
Ištrinti raštą
-
Spustelėjus šį mygtuką raštas pašalinamas iš sąrašo, o atitinkamas failas ištrinamas iš disko. Atminkite, kad negalima pašalinti jokių su GIMP platinamų raštų, kurie yra įdiegti sistemos aplanke
patterns; galite pašalinti tik tuos raštus, kuriuos pridėjote aplankuose, kur turite rašymo teisę. -
Atnaujinti raštus
-
Pressing this button causes GIMP to rescan the folders in your pattern search path, adding any newly discovered patterns to the list. This button is useful if you add new patterns to a folder, and want to make them available without having to restart GIMP.
-
Atverti raštą kaip paveikslėlį
-
If you click on this button, the current pattern is opened in a new image window. So, you can edit it. But if you try to save it with the
.pat, even with a new name, you will bang into a „Denied permission “ problem because this image file is „root“. But this is possible under Windows, less protected.
-
- Apžvalga
-
You can get the patterns context menu by right clicking on a pattern. Most of the operations on patterns are also available through buttons at the bottom of the patterns dialog. Those operations are documented there.
- Open Pattern as Image, Ištrinti raštą, Atnaujinti raštus
-
See Patterns Dialog.
- Copy Pattern Location
-
Copy Pattern Location allows you to copy the path of the selected pattern to the clipboard.
- Show in File Manager
-
Show in File Manager opens the location of the pattern in the default File Manager on your system.
You can use tags to reorganize the patterns display. See Skyrius 3.7, „Tagging“.
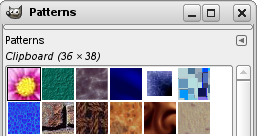
When you use the Copy or Cut command, a copy appears as a new pattern as the first entry in the Patterns dialog. This pattern will persist until you use the Copy (or Cut) command again. It will disappear when you close GIMP.
![[Pastaba]](images/note.png)
|
Pastaba |
|---|---|
|
You can save this clipboard pattern with → → as soon as it appears in the Patterns dialog. See Skyrius 3.10.9, „Įdėti kaip naują raštą“. |


