GIMP has great flexibility for arranging dialogs on your screen. A 「dialog」 is a moving window which contains options for a tool or is dedicated to a special task. A 「dock」 is a container which can hold a collection of persistent dialogs, such as the Tool Options dialog, Brushes dialog, Palette dialog, etc. Docks cannot, however, hold non-persistent dialogs such as the Preferences dialog or the image window.
GIMP は初期状態で 3 種類のドックが現れます。
-
the Tool Options, Device Status, Undo History and Images dock under the Toolbox in the left panel,
-
the Brushes, Patterns, Fonts and Document History dock in the upper part of the right panel,
-
the Layers, Channels and Paths dock in the lower part of the right panel.
いずれのドックでもダイアログがタブ化されています。
マルチウィンドウモードの場合、 ツールボックスは 補助ウィンドウ です。 ドックではありません。 シングルウィンドウモードの場合、 ツールボックスはウィンドウの中の一部となります。
ドッキング可能なウィンドウの一覧表は → のサブメニューにあります。 この一覧表でダイアログを選ぶとそのダイアログが現れます。 既にどれかのドックにそのダイアログが入っていた場合は隠れたダイアログならば表に見えるように出てきます。 まだそのダイアログが開かれていなかった場合の挙動については、 ウィンドウモードが複数ウィンドウのときと単一ウィンドウのときとでつぎのように異なった反応を見せます。
タブはクリックしたままドラッグできます。 そのまま任意のドックまで曳いてきて、
-
ドックのタブバーが色を換えて反応する位置で放つとそこのダイアログ群に統合されます。
-
ドックの 4 辺のいずれかが (図では青い線に色を換えて) ドッキングバーを顕して反応する位置で放つと、 ダイアログはドックに接合します。
マルチウィンドウモードであればダイアログのタイトルをクリックしたままドラッグすれば任意の位置へ移動できます。
単純な方法ですが、 タブメニュー 「タブメニュー」 の コマンドも使えます。
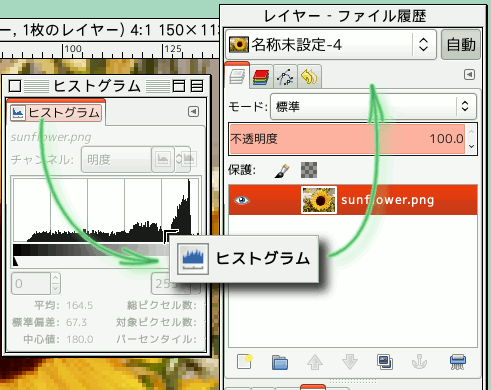
図3.8 ドックの縁にダイアログを連結
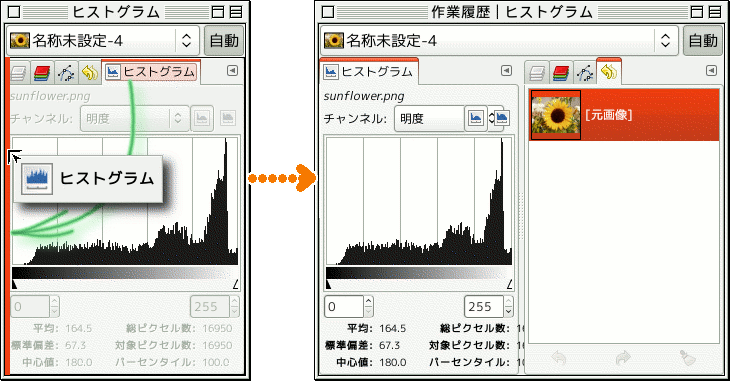
ヒストグラムダイアログを右パネルの左側面ドッキングバーまでドラッグした様子と結果: [統合されタブ化していた]ダイアログがこんどは右パネルの左隣に連結された。 そしてこのダイアログは右のパネルの一部となった。
こうして ダイアログは縦にも横にも繋げられるので、 2 枚のディスプレイモニターを利用している環境なら片方の画面にダイアログ類をまとめ、 もう一方の画面をすべて作画用に充てる使い方もできる
![[ヒント]](images/tip.png)
|
ヒント |
|---|---|
|
Press the Tab key in the image window to toggle the visibility of the docks. This is useful if the docks hide a portion of the image window. You can quickly hide all the docks, do your work, then display all the docks again. Press the Tab key inside a dock to navigate through the dock. |
In each dialog, you can access a special menu of tab-related operations by
pressing the Tab Menu button
.
The exact commands shown in the menu depend on the active dialog, but
they always include operations for creating new tabs, closing or
detaching tabs.
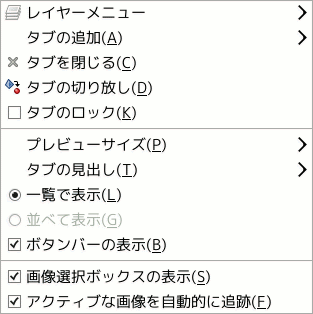
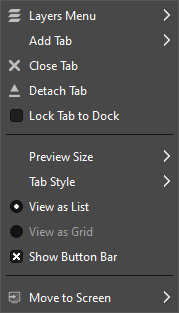
タブメニューで提供されるコマンドは次のとおり。
- 脈絡メニュー (直接関連のあるメニュー)
-
タブメニューの最初の項目はダイアログの機能に関連のある項目をまとめた脈絡メニューです。 たとえば、 レイヤータブの脈絡メニュー にはレイヤーを操作する項目が揃っています。
- タブの追加
-
はドック入りが可能なダイアログを一覧にまとめたサブメニューを開き、 ここで選んだダイアログはタブ化して追加されます。
- タブを閉じる
-
Close the dockable dialog. Closing the last dialog in a dock causes the dock itself to close.
- タブの切り放し
-
この項目はダイアログをドックから切り離し、 そのダイアログだけが入った新たなドックをつくります。 このメニュー項目はタブをクリックしてドックの及ばないところまでドラッグで曳き出すのと同じ効果があります。
新しいドックウィンドウをつくるといいましたが、 シングルウィンドウモードの場合は厳密に言えば新しいドック区画の作成となります。
If the tab is locked, this menu item is disabled.
- タブのロック
-
Prevent the dialog from being moved or detached. When activated, is disabled.
- プレビューサイズ
-
Many, but not all, dialogs have Tab menus containing a Preview Size option, which opens a submenu giving a list of sizes for the items in the dialog, from small to large. For example, the Brushes dialog shows pictures of all available brushes: the Preview Size determines how large the pictures are. The default is Medium size.
- タブの見出し
-
Tab Style opens a submenu allowing you to choose the appearance of the tabs at the top. There are five choices, but not all are enabled for every dialog:
- アイコン
-
ダイアログの種類を表すアイコンのみを表示します。
- 現在の状態
-
現在の状態 はブラシやパターンやグラデーションのような画材を選ぶダイアログに対してのみ有効です。 選ばれた画材がタブの爪に表示されます。
- 文字
-
ダイアログの種類をタブの爪に文字で表わします。
- アイコンと文字
-
アイコンと文字の両方で表示しますのでタブの爪が横長になります。
- 状態と文字
-
これは現在選択されている画材を示すアイコンと、 ダイアログの種類を表す文字とを表示します。
- View as List, 並べて表示
-
この二つの項目が現れるダイアログは、 ブラシやパターンやフォントなど、 一揃いからひとつの細目を選択する一覧表があるダイアログです。 細目とその名前の組を縦排列に並べるか、 名前を省き細目を升目状に並べるかを選べます。 それぞれに利点があり、 縦排列にすればその名前まで詳しくわかりますが、 升目状ならば一度により多くの選択肢を見て選べます。 初期設定は一律にしませんでした。 ブラシやパターンのダイアログは升目状に、 それ以外のほとんどのダイアログは縦排列にしてあります。
を選択しているときはタグが利用できます。 使い方は 「タグづけ」 でご覧ください。
リストの検索窓も利用できます。
図3.11 検索窓
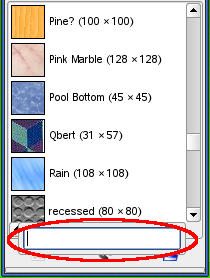
Press Ctrl+F to open the list search field, displayed at the bottom. An item must be selected for this command to be effective.
この検索窓は何も操作がない時間が 5 秒を過ぎると自動的に閉じます。
![[注記]](images/note.png)
注記 いろいろなツールのダイアログ上の「ブラシ」、 「フォント」、 「パターン」を選ぶオプションの一覧表で検索窓を呼び出せるショートカットが利用できます。
- ボタンバーの表示
-
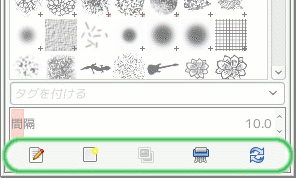
ダイアログのいくつかはその底部にボタンバーが表示できるようになっています。 たとえばパターン、 ブラシ、 グラデーションのダイアログにあります。 これは切り替え式になっていて、 チェックが入っている場合にボタンバーが表示されます。
- 画像選択ボックスの表示
-
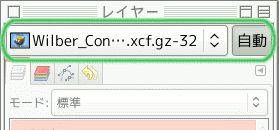
This option is available in multi-window mode only. This is a toggle. If it is checked, then the active image is shown at the top of the dock:
It is not available for dialogs docked below the Toolbox. This option is interesting only if you have several open images on your screen. - アクティブな画像を自動的に追跡
-
このオプションはマルチウィンドウモードでのみ現れます。 このオプションも画面に複数の画像を開いている場合にだけ意味があります。 このときには画像選択メニューに表示されている画像とドック内の各ダイアログが表示している画像が常に同一です。 もし仮に を無効にしていたときは、 画像を選択できるのは画像選択メニューだけになります。 もし有効ならば、 画像を直接活性化 (つまり画像ウィンドウのタイトルバーをクリック) しても画像を選択できます。
- Move to Screen
-
The option is an experimental functionality to choose a different display.
