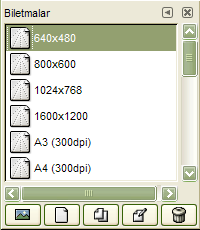
Malar er førehandsdefinerte biletinnstillingar som du kan bruka til å raskt laga eit nytt bilete med dei dimensjonane, oppløysninga osv. som du likar. GIMP kjem med mange installerte malar, men du kan også laga dine eigne. Når du opprettar eit nytt bilete, kan du få tilgang til lista over eksisterande malar for å velja ein som skal brukast som base for det nye biletet. Du kan administrera desse malane i dialogvindauget «Malar».
Dette er eit dokkpanel som kan limast inn i andre dokkpanel. Sjå nærare om dette i Del 2.3, «Dialogvindauge og dokkpanel».
Du har tilgang til det:
-
frå hovudmenyen via → → .
-
frå fanemenyen i eit anna dokkpanel ved å klikka på fanemenyknappen
 og velja → .
Du vel ein mal ved å klikka på ikonet. Dersom du høgreklikkar på ikonet, kjem det opp ein meny med dei same funksjonane som for knappane nedst i dialogvindauget.
I fanemenyen for «biletmalar» kan du velja mellom og . Dersom du ikkje har gjeve malane bestemte ikon (sjå nedanfor korleis du gjer det), vil tabellforma visa ei oppstilling med likeforma ikon. Øvst i vindauget finn du namnet på den valde malen. Dersom du i staden vel listeform, som er den vanlege, vert malane lista opp under kvarandre med ikon og namn.
Frå fanemenyen kan du også bruka menyoppføringa Storleik på førehandsvisinga for å visa ikona i eit høveleg format.
![[Tips]](images/tip.png)
|
Tips |
|---|---|
|
tastekombinasjonen Ctrl + F i ei liste vil opne eit søkefelt. Sjå Vis som liste |
Det er tre knappar nedst har desse funksjonane:
-
 Opprett eit nytt bilete frå den valde malen
-
Klikk på denne knappen for å opna eit nytt bilete med dei same innstillingane som er definerte i den valde malen.
-
 Opprett ein ny mal
-
Klikk på denne knappen for å opna dialogvindauget ny mal. Dette er det same dialogvindauget som vert brukt for å redigera malen, som er vist nedanfor.
-
 Kopier den valde malen
-
Trykk på denne knappen for å opna dialogvindauget for å redigera den definerte malen.
-
 Rediger den valde malen
-
Klikk på denne knappen for å opna dialogvindauget Rediger malder du kan justera dei biletrelaterte innstillingane for den valde malen.
-
 Slett den valde malen
-
Dette slettar den valde malen etter å ha bede om stadfesting.
Tips Every template is stored in a
templatercfile in your personal GIMP directory. If you want to restore some deleted templates, you can copy or append template entries to your file from the mastertemplatercfile in theetc/gimp/3.0directory of GIMP's system folder.
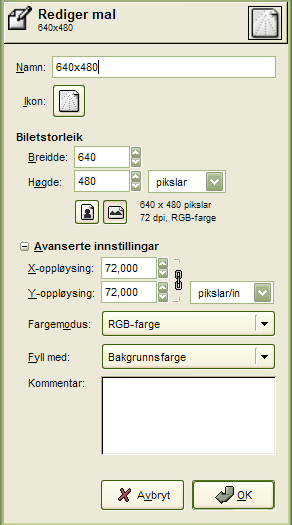
Dette dialogvindauget gjev deg høve til å endra alle innstillingane i den valde malen.
Du har tilgang til dette dialogvindauget frå knappen nedst i dialogvindauget for malar
Innstillingar
- Namn
-
Her kan du endra namnet for malen.
- Ikon
-
Du kan velja eit anna ikon som skal visast framføre namnet på malen ved å klikka på dette ikonet. Du kan henta ikonet frå ei liste over førehandsdefinerte ikon, frå ei fil i datamaskinen eller ved å lima inn frå utklippstavla.
- Biletstorleik
-
Her bestemmer du Breidd og Høgd på det nye biletet. Til vanleg vert dette målt i pikslar, men du kan endra dette etter eige ønskje ved hjelp av nedtrekkslista. Dersom du bytar måleeining, ver klar over at dette påverkar X- og Y-oppløysinga (som du kan justera i Avanserte innstillingar). Eventuelt kan du kontrollera resultatet med visninga «Punkt for punkt» i menyen .
- Knappane Ståande/Liggande
-
Denne knappen vekslar mellom ståande eller liggjande modus. Det som skjer er at verdiane for Breidd og Høgd vert bytte om. Dersom biletet er sett opp med ulike verdiar for X- og Y-oppløysing, vert også desse verdiane bytte om. Til høgre for desse knappane er det lista opp høgd, breidd, oppløysing og fargemodell brukt i det aktuelle biletet.
Avanserte innstillingar
I dei avanserte vala kan du endra fleire tilleggsinnstillingar for biletet.
- X- og Y-oppløysing
-
Verdiane i felta X-oppløysing og Y-oppløysing gjel hovudsakeleg for utskrift: dei påverkar ikkje storleiken på biletet i pikslar, men dei kan bestemma den fysiske storleiken når det vert skrive ut. X- og Y-oppløysingsverdiane kan bestemma korleis pikslane vert omsette til andre måleeiningar, for eksempel millimeter eller tommar.
Tips Ønskjer du å visa biletet på skjermen med korrekte dimensjonar, vel du → . Set forstørringa til 100 % for å visa biletet i sann skjermstorleik. Normalt vert skjermen kalibrert når du installerer GIMP, men det kan også gjerast frå dialogvindauget innstillingar.
- Fargerom
-
Du kan oppretta det nye biletet i ulike fargemodellar, anten som RGB eller i gråtone.
- RGB-farge
-
Biletet vert laga med eit fargesystem sett saman av raudt, grønt og blått. Det er dette fargesystemet som vert brukt av dataskjermen eller TV-skjermen.
- Gråtone
-
Biletet vert laga i svart og kvit med mellomliggjande gråtoner. I tillegg til dei reint artistiske interessene dine, kan formatet også vera nødvendig for ein del programtillegg. Uansett kan du alltid omforma eit RGB-bilete til gråskala-bilete om nødvendig.
Det er ikkje råd å laga eit indeksert bilete frå denne menyen. Sjølvsagt kan du likevel indeksera eit bilete, etter at du har laga det, med kommandoen → → .
- Presisjon
-
Denne innstillinga let deg definera kodinga som skal brukast for å lagra pikselinformasjon. Sjå bolken Biletkoding for meir detaljar om dette.
Fem alternativ er tilgjengelege:
-
8-bit heiltal
-
16-bit heiltal
-
32-bit heiltal
-
16-bit desimaltal
-
32-bit desimaltal
I tilfelle du lurar på kva skilnaden mellom heiltal og desimaltal i det grafiske området er: Dersom du har eit bilete med 16-bit heiltalspresisjon per kanal, så har du 65 536 valørar av kvar av fargane raudt, grønt og blått – alle med same fargeavstand. Dersom du brukar desimaltal, er avstanden mellom fargane ikkje like. Du kan då fordela verdiane over bestemte område slik at dersom du for eksempel har eit svært mørkt bilete med mange nyansar av mørkeraudt, kan du ha nytte av desimaltalspresisjonen fordi du då kan gjera dei lysare fargetonene mindre viktige og såleis få fleire fargedetaljar frå dei mørkeraude områda.
Figur 15.54. Presisjonseksempel
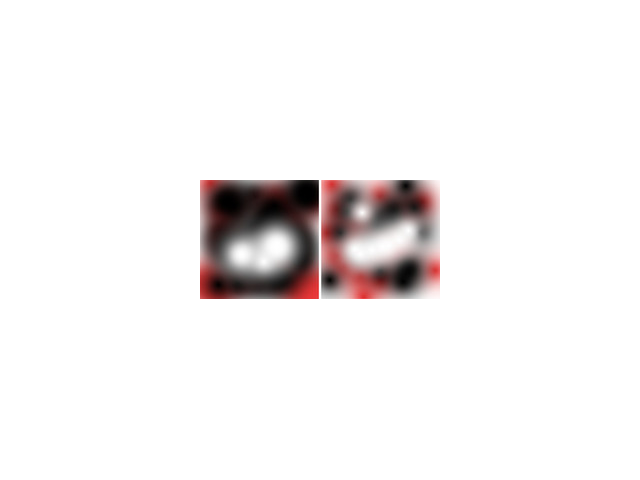
Biletet til venstre er 8-bit, det til høgre er 32-bit. Du ser at det er mange fleire fargar mellom fargeovergangane i det høgre biletet.
-
- Gamma
-
Her kan du velja kanalkodinga for biletet. Vala du har erulineær og lineært lys. For 8-bit heiltalspresisjon er standard ulineær og for 32-bit desimaltalspresisjon er standard lineært lys. Du finn meir informasjon om dette i kva for presisjon skal eg velja.
- Fargeprofil
-
Her kan du velja ein fargeprofil for biletet. Standard er GIMP sin standard fargeprofil basert på fargerom, presisjon og gamma. Viss du heller vil nytta ein annan fargeprofil, kan du velja ein ICC-fargeprofil frå ei eller anna plassering i datamaskinen ved å velja Vel fargeprofil frå disk ….
- Fargeprofil for utskriftsimuleringa
-
Du kan leggja til ein CMYK-fargeprofil til biletet med dette alternativet. Denne profilen vert brukt til å laga ei fargetilpassa vising av biletet når Fargar for utskriftssimulering er slått på i menyen Vis. Som med Fargeprofilen, viss du heller vil bruka ein annan fargeprofil, kan du velja ei ICC-fargeprofilfil frå ein stad på datamaskinen din ved å velja Vel fargeprofil frå disk ….
- Fargetilpassinga for utskriftssimulering
-
I dette valet bestemmer du korleis fargetilpassinga som skal brukast for å konvertera fargane frå utskriftssimuleringa til visingsutstyret ditt når → → er slått på. Dei fire vala er «Perseptuell», «Relativt kolorimetrisk», «Metning» og «Absolutt kolorimetrisk». Sjå Del 6.4, «Fargestyring» og Del 6.8, «Undermenyen «Fargestyring»» for meir om dette.
- Bruk svartpunktkompensering
-
Når denne er slått på, vil BPC-algoritmen prøva å justera visinga av mørkare område i biletet når fargar for utskriftssimulering er slått på i menyen Vis.
- Fyll med
-
Her bestemmer du kva bakgrunnsfarge det nye biletet skal ha. Om du er usikker, kan du berre velje eit eller anna. Det er fullt mogleg å byta bakgrunnsfarge seinare. Du finn meir informasjon om dette i Lagdialogvindauge..
Du har fleire val:
-
Fyll biletet med den forgrunnsfargen som er vist i verktøykassen.
Merk at du kan endra forgrunnsfargen når dialogvindauget «Nytt bilete» er ope.
-
Fyll biletet med den gjeldande bakgrunnsfargen vist i verktøykassen. (Du kan også endra bakgrunnsfargen så lenge dialogvindauget er ope).
-
Fyll biletet med mellomgrå (CIELAB). Dette vil oppretta eit lag med ein gråfarge som er 50 % av den perseptuell lysmengda i den valde fargemodusen.
-
Fyll biletet med kvitt.
-
Fill the image with Transparency. If you choose this option, the image is created with an alpha channel and the background is transparent. The transparent parts of the image are then displayed with a checkered pattern, to indicate the transparency.
-
Fyll biletet med eit mønster. Vel du dette, vert biletet fylt med det gjeldande mønsteret, som du kan endra når dette dialogvindauget er ope.
-
- Merknad
-
Her kan du skriva inn ein merknad til biletet. Teksten vert lagt til i biletet som såkalla parasitt og kan også lagrast i nokre av filformata som t.d. PNG, JPEG og GIF.
![[Notat]](images/note.png)
Notat Du kan lesa den lagra merknaden ved å opna vindauget for .bileteigenskapar.


