Ο διάλογος «Μονοπάτια» χρησιμοποιείται για διαχείριση μονοπατιών, επιτρέποντας τη δημιουργία ή διαγραφή τους, την αποθήκευση τους, τη μετατροπή τους σε και από επιλογές, κλ.π. Ανατρέξτε στο Τμήμα 4, « Μονοπάτια » για περισσότερες πληροφορίες σχετικά με τα μονοπάτια.
Αυτός ο διάλογος είναι ένας προσαρτήσιμος διάλογος· δείτε την ενότητα Τμήμα 2.3, «Διάλογοι και προσάρτηση» για βοήθεια στο χειρισμό του.
Μπορείτε να τον προσπελάσετε:
-
από το κύριο μενού, ως → → .
-
από το μενού καρτέλας σε οποιοδήποτε προσαρτήσιμο διάλογο πατώντας στο
 και επιλέγοντας → .
Στο μενού , υπάρχει ένας κατάλογος των αποσπωμένων παραθύρων που υπάρχει μόνο εάν τουλάχιστον ένας διάλογος παραμένει ανοιχτός. Σε αυτήν την περίπτωση, μπορείτε να ανυψώσετε το διάλογο «Μονοπάτια» από το κύριο μενού: → .
- Επισκόπηση
-
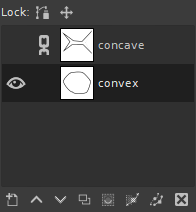
Αυτό το παράθυρο διαλόγου εμφανίζει έναν κατάλογο με όλα τα μονοπάτια που υπάρχουν στην τρέχουσα εικόνα. Για κάθε μονοπάτι μπορείτε να ορίσετε τα χαρακτηριστικά του, όπως εξηγείται παρακάτω, και να εκτελέσετε συγκεκριμένες ενέργειες χρησιμοποιώντας τα πλήκτρα στο κάτω μέρος του παραθύρου διαλόγου, ή χρησιμοποιώντας το μενού περιβάλλοντος.
Στη λειτουργία πολλαπλών παραθύρων, μπορείτε να εμφανίσετε το όνομα της ενεργής εικόνας στο επάνω μέρος της προσάρτησης επιλέγοντας «Εμφάνιση επιλογής εικόνας» από το μενού καρτέλας. Αυτό σας επιτρέπει να δείτε με μια ματιά σε ποια εικόνα ανήκουν τα μονοπάτια στα οποία εργάζεστε.
Εάν η λίστα δεν είναι κενή, σε οποιαδήποτε δοσμένη στιγμή ένα από τα μέλη είναι το ενεργό μονοπάτι της εικόνας, που θα είναι το υποκείμενο κάθε ενέργειας που εκτελείτε χρησιμοποιώντας το μενού διαλόγου ή τα κουμπιά στον πυθμένα: το ενεργό μονοπάτι φαίνεται τονισμένο στη λίστα. Κλικ σε οποιαδήποτε από τις εγγραφές θα την κάνει ενεργό μονοπάτι.
Δεξιοπατώντας σε οποιαδήποτε καταχώρηση στον κατάλογο, εμφανίζεται το μενού μονοπατιών. Μπορείτε επίσης να προσπελάσετε το μενού μονοπατιών από το μενού καρτέλας.
- Επιλογή πολλαπλών μονοπατιών
-
Το GIMP σάς επιτρέπει να επιλέξετε πολλαπλά μονοπάτια και να εκτελέσετε ενέργειες σε αυτά, όπως να βάψετε ή να γεμίσετε. Η επιλογή πολλαπλών μονοπατιών γίνεται χρησιμοποιώντας το ποντίκι και το πλήκτρο Shift, για να προσθέσετε μια σειρά μονοπατιών, ή το πλήκτρο Ctrl, για να προσθέσετε ή να αφαιρέσετε το πατημένο μονοπάτι.
- Κεφαλίδα καταλόγου μονοπατιών
-
Ακριβώς πάνω από τον κατάλογο των μονοπατιών βρίσκεται η γραμμή κεφαλίδας. Στα αριστερά βλέπετε τα εικονίδια που υποδεικνύουν τις στήλες ορατότητας και κλειδώματος. Στη μέση, μια ετικέτα κειμένου θα σας δείξει πόσα μονοπάτια είναι επιλεγμένα αυτήν τη στιγμή, εάν είναι περισσότερα από ένα.
- Χαρακτηριστικά μονοπατιού
-
Κάθε μονοπάτι εμφανίζεται στον κατάλογο με τα δικά τουχαρακτηριστικά, τα οποία είναι πολύ παρόμοια με τα χαρακτηριστικά στρώσης:
-
 Ορατότητα μονοπατιού
-
Από προεπιλογή, τα μονοπάτια δεν είναι ορατά. Αυτό το εικονίδιο εμφανίζεται όταν το μονοπάτι είναι ορατή. Πατώντας σε αυτό, εναλλάσσεστε μεταξύ ορατού και αόρατου. Όταν ένα μονοπάτι είναι «ορατό», σχεδιάζεται ένα περίγραμμα πάνω από κάθε τμήμα του μονοπατιού στην οθόνη της εικόνας. Αυτό δεν αλλάζει τα πραγματικά δεδομένα εικονοστοιχείων της εικόνας. Πατώντας Shift στο εικονίδιο προκαλεί την απόκρυψη, όλων των άλλων μονοπατιών.
-
 Χαρακτηριστικά κλειδώματος μονοπατιού
-
Κάθε μονοπάτι έχει χαρακτηριστικά κλειδώματος. Εάν ένα από τα χαρακτηριστικά του είναι ενεργοποιημένο, το αντίστοιχο εικονίδιο κλειδώματος θα εμφανιστεί μπροστά από τη μικρογραφία.
Όταν έχουν οριστεί πολλαπλά χαρακτηριστικά, εμφανίζεται εδώ ένα εικονίδιο διπλού κλειδώματος. Πατώντας σε αυτήν τη στήλη μπορείτε να αλλάξετε αυτά τα χαρακτηριστικά.
-
 Κλείδωμα μονοπατιού
-
Αυτό το εικονίδιο εμφανίζεται όταν το «κλείδωμα μονοπατιού» είναι ενεργοποιημένο για το τρέχον μονοπάτι. Όταν αυτό είναι ενεργοποιημένο, το μονοπάτι κλειδώνεται για οποιαδήποτε ενέργεια που το αλλάζει, πράγμα που σημαίνει ότι δεν θα γίνουν αλλαγές σε αυτό το μονοπάτι. Πατώντας το εικονίδιο εναλλάσσεται μεταξύ ενεργοποίησης και απενεργοποίησης.
-
 Κλείδωμα θέσης και μεγέθους
-
Αυτό το εικονίδιο εμφανίζεται όταν η επιλογή «κλείδωμα θέσης μονοπατιού» είναι ενεργοποιημένη για το τρέχον μονοπάτι. Όταν είναι ενεργοποιημένο, το μονοπάτι κλειδώνεται για οποιαδήποτε ενέργεια που αλλάζει τη θέση του. Πατώντας το εικονίδιο εναλλάσσεται μεταξύ ενεργοποιημένου και απενεργοποιημένου.
-
 Κλείδωμα ορατότητας
-
Αυτό το πλήκτρο εναλλαγής ελέγχει τη ρύθμιση «Κλειδώματος» για την ορατότητα του μονοπατιού. Εάν είναι ενεργοποιημένο, η ορατότητα του μονοπατιού δεν μπορεί να αλλάξει έως ότου απενεργοποιήσετε το κλείδωμα.
-
- Μικρογραφία
-
Ένα μικρό εικονίδιο προεπισκόπησης αντιπροσωπεύει το εφέ του μονοπατιού. Αυτή η προεπισκόπηση μπορεί να μεγεθυνθεί κρατώντας πατημένο το αριστερό πλήκτρο του ποντικιού πάνω της. Εάν σύρετε τη μικρογραφία στο παράθυρο διαλόγου Στρώσεις, θα δημιουργηθεί μια νέα στρώση με ένα εικονογραφικοποιημένο (ραστεροποιημένο) αντίγραφο του μονοπατιού.
- Όνομα μονοπατιού
-
Το όνομα του μονοπατιού πρέπει να είναι μοναδικό μες την εικόνα. Με διπλό κλικ στο όνομα θα σας επιτρέψει να το επεξεργαστείτε. Εάν το όνομα που δημιουργείτε υπάρχει ήδη, ένας αριθμός θα προσαρτηθεί (π.χ., «#1») για να γίνει μοναδικός.
-
- Διαχείριση μονοπατιών
-
Η γραμμή πλήκτρων στο κάτω μέρος προσφέρει τις ακόλουθες λειτουργίες:
Αυτά τα πλήκτρα αντιστοιχούν σε καταχωρήσεις στο μενού περιβάλλοντος (το οποίο μπορείτε να προσπελάσετε δεξιοπατώντας σε μια καταχώρηση στον κατάλογο), αλλά μερικά από αυτά έχουν επιπλέον επιλογές που διατίθενται κρατώντας πατημένα τα πλήκτρα τροποποίησης ενώ πατάτε το πλήκτρο.
-
 Νέο μονοπάτι
-
Δείτε Νέο μονοπάτι. Κρατώντας πατημένο το Shift δημιουργείται ένα νέο (κενό) μονοπάτι με τις τελευταίες τιμές που χρησιμοποιήθηκαν, χωρίς να ανοίξετε το παράθυρο διαλόγου Νέο μονοπάτι.
-
 Ανύψωση μονοπατιών
-
Ανατρέξτε στην ενότητα Ανύψωση μονοπατιών. Κρατώντας πατημένο το Shift μετακινούνται τε επιλεγμένα μονοπάτια στην κορυφή του καταλόγου.
-
 Βύθιση μονοπατιών
-
Ανατρέξτε στην ενότητα Βύθιση μονοπατιών. Κρατώντας πατημένο το Shift μετακινούνται τα επιλεγμένα μονοπάτια στο κάτω μέρος του καταλόγου.
-
 Διπλασιασμός μονοπατιών
-
Δείτε Διπλασιασμός μονοπατιών.
-
 Μονοπάτια σε επιλογή
-
Μετατρέπει τα μονοπάτια σε επιλογή. Ανατρέξτε στο Μονοπάτια σε επιλογή για μια πλήρη εξήγηση. Μπορείτε να χρησιμοποιήσετε τα πλήκτρα τροποποίησης για να ορίσετε τον τρόπο με τον οποίο η νέα επιλογή αλληλεπιδρά με την υπάρχουσα επιλογή:
Τροποποιητές Ενέργεια Κανένα Αντικατάσταση υπάρχουσας επιλογής Μετατόπιση Προσθήκη στην επιλογή Ctrl Αφαίρεση από την επιλογή Μετατόπιση+Ctrl Τομή με την επιλογή. -
 Επιλογή σε μονοπάτι
-
Πατώντας το πλήκτρο Shift εμφανίζεται το παράθυρο διαλόγου Προηγμένες ρυθμίσεις, το οποίο σας επιτρέπει να προσαρμόσετε τον τρόπο με τον οποίο η επιλογή μετατρέπεται σε μονοπάτι.
-
 Βάψιμο κατά μήκος των μονοπατιών
-
Ανατρέξτε στο Χρωματισμός μονοπατιού. Κρατώντας πατημένο το Shift βάφεται το μονοπάτι με βάση τις τελευταίες τιμές που χρησιμοποιήθηκαν χωρίς να ανοίξετε το παράθυρο διαλόγου χρωματισμός μονοπατιών.
-
 Διαγραφή μονοπατιών
-
Η Διαγραφή μονοπατιών διαγράφει τα τρέχοντα επιλεγμένα μονοπάτια.
-
Το μενού μονοπατιών μπορεί να εμφανιστεί με δεξί κλικ σε εγγραφή μονοπατιού στη λίστα του διαλόγου μονοπατιών, ή επιλέγοντας την κορυφαία είσοδο ("μενού μονοπατιών") από το μενού καρτέλας διάλογος μονοπατιού. Αυτό το μενού σας δίνει πρόσβαση στις περισσότερες λειτουργίες που επηρεάζουν μονοπάτια.
- Επεξεργασία μονοπατιού
-
Το Επεξεργασία μονοπατιού είναι ένας εναλλακτικός τρόπος για ενεργοποίηση του Εργαλείο μονοπατιών, που χρησιμοποιείται για δημιουργία και επεξεργασία μονοπατιών. Μπορεί επίσης να ενεργοποιηθεί από την εργαλειοθήκη, ή χρησιμοποιώντας τη συντόμευση πληκτρολογίου Β.
- Επεξεργασία γνωρισμάτων διαδρομής
-
Επεξεργασία γνωρισμάτων μονοπατιού εμφανίζει ένα μικρό διάλογο που επιτρέπει την αλλαγή του ονόματος του μονοπατιού. Μπορείτε επίσης να το κάνετε με διπλό κλικ στο όνομα στη λίστα του διαλόγου μονοπατιών.
- Ετικέτες χρώματος
-
Οι Ετικέτες χρώματος εμφανίζουν ένα υπομενού, παρόμοιο με αυτό του διαλόγου στρώσεων, το οποίο σας επιτρέπει να επιλέξετε μια ετικέτα χρώματος για τα επιλεγμένα μονοπάτια.
- Νέο μονοπάτι
-
Το Νέο μονοπάτι δημιουργεί ένα νέο μονοπάτι, το προσθέτει στον κατάλογο του διαλόγου μονοπατιών και το κάνει ενεργό μονοπάτι για την εικόνα. Εμφανίζει ένα διάλογο που επιτρέπει την ονοματοδοσία του μονοπατιού. Το νέο μονοπάτι δημιουργείται χωρίς σημεία αγκύρωσης, έτσι θα χρειαστείτε τη χρήση του εργαλείου μονοπατιού για να του δώσετε μερικά, πριν να μπορέσετε να το χρησιμοποιήσετε για οτιδήποτε.
- Ανύψωση μονοπατιών
-
Η επιλογή Ανύψωση μονοπατιών μετακινεί τα επιλεγμένα μονοπάτια μία θέση υψηλότερα στον κατάλογο στο παράθυρο διαλόγου Μονοπατιών.
Η θέση ενός μονοπατιού στον κατάλογο δεν έχει λειτουργική σημασία, επομένως αυτό είναι απλώς μια διευκόλυνση που σας βοηθά να διατηρείτε τα πράγματα οργανωμένα.
- Βύθιση μονοπατιών
-
Η επιλογή Βύθιση μονοπατιών μετακινεί τα επιλεγμένα μονοπάτια μία θέση χαμηλότερα στον κατάλογο στο παράθυρο διαλόγου μονοπατιών.
Η θέση ενός μονοπατιού στον κατάλογο δεν έχει λειτουργική σημασία, επομένως αυτό είναι απλώς μια διευκόλυνση που σας βοηθά να διατηρείτε τα πράγματα οργανωμένα.
- Διπλασιασμός μονοπατιών
-
Ο «Διπλασιασμός μονοπατιών» δημιουργεί ένα αντίγραφο των ενεργών μονοπατιών, αποδίδοντας μοναδικά ονόματα, τα προσθέτει στον κατάλογο του διαλόγου μονοπατιών και τα κάνει τα επιλεγμένα μονοπάτια για την εικόνα. Τα αντίγραφα θα είναι ορατό μόνο εάν τα αρχικά μονοπάτια ήταν ορατά.
- Διαγραφή μονοπατιών
-
Η Διαγραφή μονοπατιών διαγράφει τα τρέχοντα επιλεγμένα μονοπάτια.
- Συγχώνευση ορατών μονοπατιών
-
Συγχώνευση ορατών μονοπατιών παίρνει όλα τα μονοπάτια στην εικόνα που είναι ορατά (δηλαδή, όλα όσα δείχνουν εικονίδια «ανοιχτού ματιού» στο διάλογο μονοπατιών) και τα μετατρέπουν σε συστατικά ενός μόνου μονοπατιού. Αυτό μπορεί να είναι βολικό εάν θέλετε να τα βάψετε όλο κατά τον ίδιο τρόπο κλ.
- Μονοπάτια σε επιλογή, Προσθήκη μονοπατιών στην επιλογή, Αφαίρεση μονοπατιών από την επιλογή, Τομή μονοπατιών με την επιλογή
-
Αυτές οι εντολές μετατρέπουν όλες τα ενεργά μονοπάτια σε μια επιλογή και στη συνέχεια τα συνδυάζουν με την υπάρχουσα επιλογή με τους καθορισμένους τρόπους. (Η εντολή Μονοπάτια στην επιλογή απορρίπτει την υπάρχουσα επιλογή και την αντικαθιστά με μία που σχηματίζεται από το μονοπάτι.) Εάν είναι απαραίτητο, τυχόν μη κλειστά στοιχεία του μονοπατιού κλείνουν συνδέοντας το τελευταίο σημείο αγκύρωσης με το πρώτο σημείο αγκύρωσης με μια ευθεία γραμμή. Οι «διάστικτες γραμμές» για την επιλογή που προκύπτει θα πρέπει να ακολουθούν στενά το μονοπάτι, αλλά μην περιμένετε η αντιστοιχία να είναι τέλεια.
- Επιλογή σε μονοπάτι
-
Αυτή η λειτουργία μπορεί να προσπελαστεί με ποικίλους τρόπους:
-
Από το κύριο μενού, ως →
-
Από το μενού διαλόγου μονοπατιών, ως .
-
Από το πλήκτρο Επιλογή σε μονοπάτι
στο κάτω μέρος του παραθύρου διαλόγου Μονοπατιών.
Η Επιλογή σε μονοπάτι δημιουργεί ένα νέο μονοπάτι από την επιλογή της εικόνας. Στις περισσότερες περιπτώσεις το τελικό μονοπάτι θα ακολουθήσει στενά τις «διάστικτες στιγμές» της επιλογής, αλλά η αντιστοιχία δεν είναι συνήθως τέλεια.
Η μετατροπή μιας δισδιάστατης μάσκας επιλογής σε μονοδιάστατο μονοπάτι περιλαμβάνει μερικούς μάλλον περίπλοκους αλγόριθμους: μπορείτε να αλλάξετε τον τρόπο που γίνεται χρησιμοποιώντας τις Προηγμένες επιλογές, οι οποίες προσπελάζονται κρατώντας πατημένο το πλήκτρο Shift, ενώ πατάτε το πλήκτρο Επιλογή σε μονοπάτι
στο κάτω μέρος του παραθύρου διαλόγου Μονοπάτια. Αυτό εμφανίζει το παράθυρο διαλόγου Προηγμένες ρυθμίσεις, το οποίο σας επιτρέπει να ορίσετε πολλές διαφορετικές επιλογές. Γενικά, η Επιλογή σε μονοπάτι θα κάνει αυτό που περιμένετε, χωρίς να χρειάζεται να προσαρμόσετε τις προηγμένες ρυθμίσεις. -
- Γέμισμα μονοπατιών
-
Αυτή η λειτουργία μπορεί να προσπελαστεί με ποικίλους τρόπους:
-
Από το κύριο μενού, ως →
-
Από το μενού διαλόγου μονοπατιών, ως .
-
Από το πλήκτρο Γέμισμα μονοπατιών στις επιλογές εργαλείου για το εργαλείο μονοπατιών.
Το Γέμισμα μονοπατιών γεμίζει όλες τις περιοχές που οριοθετούνται από τα επιλεγμένα μονοπάτια με το τρέχον χρώμα προσκηνίου, ή το τρέχον επιλεγμένο μοτίβο. Ανατρέξτε στην ενότητα σχετικά με το Γέμισμα μονοπατιών για περισσότερες πληροφορίες.
-
- Χρωματισμός μονοπατιών…
-
Αυτή η λειτουργία μπορεί να προσπελαστεί με ποικίλους τρόπους:
-
Από το κύριο μενού, ως →
-
Από το μενού διαλόγου μονοπατιών, ως .
-
Από το πλήκτρο Βαφή κατά μήκος του μονοπατιού
στο κάτω μέρος του διαλόγου μονοπατιών. -
Από το πλήκτροΧρωματισμός μονοπατιών στις επιλογές εργαλείου για το εργαλείο μονοπατιών.
Το «Χρωματισμός μονοπατιών» αποδίδει τα επιλεγμένα μονοπάτια στην ενεργή στρώση της εικόνας, επιτρέποντας μια μεγάλη ποικιλία τεχνοτροπιών γραμμής και επιλογών βαφής. Δείτε τις ενότητες για το Χρωματισμό μονοπατιών και Βαφή για περισσότερες πληροφορίες.
-
- Αντιγραφή μονοπατιών
-
Η Αντιγραφή μονοπατιών αντιγράφει τα επιλεγμένα μονοπάτια στο πρόχειρο μονοπατιών, επιτρέποντάς σας να το επικολλήσετε σε διαφορετική εικόνα.
![[Υπόδειξη]](images/tip.png)
Υπόδειξη Μπορείτε επίσης να αντιγράψετε και να επικολλήσετε μονοπάτια σέρνοντας το εικονίδιο τους από τον διάλογο μονοπατιών στην οθόνη της εικόνας-στόχου.
![[Σημείωση]](images/note.png)
Σημείωση Όταν αντιγράφετε ένα μονοπάτι σε εικόνα, δεν είναι ορατό. Πρέπει να το κάνετε ορατό στο διάλογο μονοπατιών.
- Επικόλληση μονοπατιού
-
Η Επικόλληση μονοπατιού δημιουργεί ένα νέο μονοπάτι από τα περιεχόμενα του προχείρου του μονοπατιού, το προσθέτει στον κατάλογο του διαλόγου μονοπατιών και το κάνει ενεργό μονοπάτι για την εικόνα. Εάν κανένα μονοπάτι δεν έχει αντιγραφεί προηγουμένως στο πρόχειρο, η εγγραφή μενού θα είναι ανενεργή.
- Εξαγωγή μονοπατιών
-
Η Εξαγωγή μονοπατιών… σας επιτρέπει την αποθήκευση μονοπατιού σε αρχείο: εμφανίζει έναν διάλογο αποθήκευσης αρχείου που επιτρέπει τον καθορισμό του ονόματος του αρχείου και της τοποθεσίας. Μπορείτε αργότερα να προσθέσετε αυτό το μονοπάτι σε οποιαδήποτε εικόνα GIMP χρησιμοποιώντας την εντολή Εισαγωγή μονοπατιού. Η χρησιμοποιούμενη μορφή για αποθήκευση μονοπατιών είναι SVG: αυτό σημαίνει ότι προγράμματα διανυσματικών γραφικών όπως το Inkscape θα μπορούν να εισάγουν τα μονοπάτια που αποθηκεύσατε. Δείτε την ενότητα Μονοπάτια για περισσότερες πληροφορίες για αρχεία SVG και πώς συσχετίζονται με τα μονοπάτια GIMP.
- Εισαγωγή μονοπατιού
-
Η Εισαγωγή μονοπατιού… δημιουργεί ένα νέο μονοπάτι από ένα αρχείο SVG: εμφανίζει ένα διάλογο επιλογής αρχείου που επιτρέπει την περιήγηση στο αρχείο. Δείτε την ενότητα Μονοπάτια για πληροφορίες για αρχεία SVG και τη σχέση τους με μονοπάτια GIMP.


