Indholdsfortegnelse
- 1. Introduktion til menuer
- 2. Menuen “Fil”
-
- 2.1. Overview
- 2.2. Nyt …
- 2.3. Opret
- 2.4. Åbn …
- 2.5. Åbn som lag …
- 2.6. Åbn placering …
- 2.7. Åbn seneste
- 2.8. Gem
- 2.9. Gem som …
- 2.10. Gem en kopi …
- 2.11. Fortryd ændringer
- 2.12. Eksportér … og Overskriv …
- 2.13. Eksportér som …
- 2.14. Opret skabelon …
- 2.15. Udskriv
- 2.16. Send via e-mail
- 2.17. Kopiér billedplacering
- 2.18. Vis i filhåndtering
- 2.19. Luk visning
- 2.20. Luk alle
- 2.21. Afslut
- 3. Menuen “Redigér”
-
- 3.1. Overview
- 3.2. Fortryd
- 3.3. Omgør
- 3.4. Fortrydelseshistorik
- 3.5. Klip
- 3.6. Kopiér
- 3.7. Kopiér synlige
- 3.8. Indsæt
- 3.9. Indsæt på samme placering
- 3.10. Indsæt som
- 3.11. Buffer
- 3.12. Ryd
- 3.13. Udfyld med forgrundsfarve
- 3.14. Udfyld med baggrundsfarve
- 3.15. Udfyld med mønster
- 3.16. Udfyld markeringsomridset
- 3.17. Udfyld kurver
- 3.18. Optegn markering
- 3.19. Optegn kurver
- 3.20. Indstillinger
- 3.21. Inputenheder
- 3.22. Tastaturgenveje
- 3.23. Moduler
- 3.24. Enheder
- 4. Menuen “Marker”
-
- 4.1. Overview
- 4.2. Markér alt
- 4.3. Intet
- 4.4. Invertér
- 4.5. Gør flydende
- 4.6. Efter farve
- 4.7. Markering fra kurver
- 4.8. Markeringsredigering
- 4.9. Udtynd
- 4.10. Gør skarpere
- 4.11. Formindsk
- 4.12. Udvid
- 4.13. Indram
- 4.14. Fjern huller
- 4.15. Forvræng
- 4.16. Afrundet rektangel
- 4.17. Ekspresmaske til/fra
- 4.18. Gem som kanal
- 4.19. Til kurve
- 5. Menuen “Vis”
-
- 5.1. Overblik
- 5.2. Ny visning
- 5.3. Vis alt
- 5.4. Punkt for punkt
- 5.5. Zoom
- 5.6. Vend og rotér
- 5.7. Centrér billede i vindue
- 5.8. Pak sammen
- 5.9. Fuldskærm
- 5.10. Flyt til skærm
- 5.11. Navigationsvindue
- 5.12. Visningsfiltre
- 5.13. Farvestyring
- 5.14. Farvestyring af denne visning
- 5.15. Skærmkorrektur af farver
- 5.16. Gengivelsesmetode for skærmen
- 5.17. Sortpunktskompensation
- 5.18. Markér farver uden for farveskalaen
- 5.19. Som i indstillinger
- 5.20. Vis markering
- 5.21. Vis lagets kant
- 5.22. Vis lærredets kant
- 5.23. Vis hjælpelinjer
- 5.24. Vis gitter
- 5.25. Vis prøvepunkter
- 5.26. Ret ind efter hjælpelinjer
- 5.27. Ret ind efter gitter
- 5.28. Ret ind efter lærredets kanter
- 5.29. Snap to Active Path
- 5.30. Ret ind efter afgrænsningsrammer
- 5.31. Ret ind efter ækvidistance
- 5.32. Udfyldningsfarve
- 5.33. Vis menulinje
- 5.34. Vis linealer
- 5.35. Vis rullebjælker
- 5.36. Vis statuslinje
- 6. Menuen “Billede”
-
- 6.1. Oversigt
- 6.2. Duplikér
- 6.3. Undermenuen “Tilstand”
- 6.4. RGB-tilstand
- 6.5. Tilstanden gråtoner
- 6.6. Indekseret tilstand
- 6.7. Undermenuen “Kodning”
- 6.8. Undermenuen “Farvestyring”
- 6.9. Brug sRGB-profil
- 6.10. Tildel farveprofil
- 6.11. Konvertér til farveprofil
- 6.12. Fjern farveprofil
- 6.13. Gem farveprofilen i en fil
- 6.14. Skærmkorrekturprofil
- 6.15. Gengivelsesmetode for skærmkorrektur
- 6.16. Sortpunktskompensation
- 6.17. Undermenuen “Transformér”
- 6.18. Vend vandret og Vend lodret
- 6.19. Rotation
- 6.20. Lærredstørrelse
- 6.21. Tilpas lærred til lag
- 6.22. Tilpas lærred til markering
- 6.23. Udskriftsstørrelse
- 6.24. Skalér billede
- 6.25. Beskær billede
- 6.26. Skær ud med hjælpelinjer
- 6.27. Nidkær beskæring
- 6.28. Sammenlæg synlige lag
- 6.29. Sammenlæg billedets lag (fjern gennemsigtighed)
- 6.30. Justér synlige lag …
- 6.31. Undermenuen “Hjælpelinjer”
- 6.32. Ny hjælpelinje (i procent)
- 6.33. Ny hjælpelinje
- 6.34. Nye hjælpelinjer fra markering
- 6.35. Fjern alle hjælpelinjer
- 6.36. Indstil gitter …
- 6.37. Billedegenskaber
- 6.38. Undermenuen “Metadata”
- 6.39. Metadataredigering
- 6.40. Metadatavisning
- 7. Menuen “Lag”
-
- 7.1. Overview
- 7.2. Nyt lag
- 7.3. Nyt fra synlig
- 7.4. Ny laggruppe
- 7.5. Duplikér lag
- 7.6. Forankr flydende lag eller maske
- 7.7. Sammenlæg nedad
- 7.8. Sammenlæg laggrupper
- 7.9. Slet lag
- 7.10. Tekstkommandoerne i menuen Lag
- 7.11. Kassér tekstoplysninger
- 7.12. Tekst til kurve
- 7.13. Tekst langs kurve
- 7.14. Undermenuen “Stak”
- 7.15. Vælg forrige lag
- 7.16. Vælg næste lag
- 7.17. Vælg øverste lag
- 7.18. Vælg nederste lag
- 7.19. Hæv lag
- 7.20. Sænk lag
- 7.21. Lag til top
- 7.22. Lag til bund
- 7.23. Vend lagrækkefølgen om
- 7.24. Undermenuen “Maske”
- 7.25. Tilføj lagmasker
- 7.26. Anvend lagmasker
- 7.27. Slet lagmasker
- 7.28. Vis lagmasker
- 7.29. Redigér lagmaske
- 7.30. Deaktivér lagmasker
- 7.31. Masker til markering
- 7.32. Tilføj masker til markering
- 7.33. Træk masker fra markering
- 7.34. Gennemskær masker med markering
- 7.35. Undermenuen “Gennemsigtighed”
- 7.36. Tilføj alfakanal
- 7.37. Fjern alfakanal
- 7.38. Farve til alfa
- 7.39. Sammenlæg lag (fjern partiel gennemsigtighed)
- 7.40. Alfatærskel
- 7.41. Alfa til markering
- 7.42. Tilføj alfa til markering
- 7.43. Træk alfa fra markering
- 7.44. Gennemskær alfa med markering
- 7.45. Undermenuen “Transformér”
- 7.46. Vend vandret
- 7.47. Vend lodret
- 7.48. Rotér 90° med uret
- 7.49. Rotér 90° mod uret
- 7.50. Rotér 180°
- 7.51. Fri rotation
- 7.52. Forskydning
- 7.53. Lagets kantstørrelse
- 7.54. Lag til billedstørrelse
- 7.55. Skalér lag
- 7.56. Ændr lags størrelse til markering
- 7.57. Beskær lag til indhold
- 8. Menuen “Farver”
-
- 8.1. Oversigt
- 8.2. Farvebalance
- 8.3. Farvetemperatur
- 8.4. Farvetone/farvestyrke
- 8.5. Farvetone/mætning
- 8.6. Mætning
- 8.7. Eksponering
- 8.8. Skygger/højlys
- 8.9. Lysstyrke/kontrast
- 8.10. Niveauer
- 8.11. Kurver
- 8.12. Invertér
- 8.13. Invertér lineært
- 8.14. Invertér valør
- 8.15. Undermenuen “Auto”
- 8.16. Udlign
- 8.17. Hvidbalance
- 8.18. Stræk kontrast
- 8.19. Stræk HSV-kontrast
- 8.20. Farveforbedring
- 8.21. Undermenuen “Komponenter”
- 8.22. Kanalmikser
- 8.23. Udtræk komponent
- 8.24. Monomikser
- 8.25. Sammensæt
- 8.26. Opsplit
- 8.27. Sæt sammen igen
- 8.28. Undermenuen “Fjern mætning”
- 8.29. Farve til grå
- 8.30. Fjern mætning
- 8.31. Monomikser
- 8.32. Sepia
- 8.33. Undermenuen “Afbildning”
- 8.34. Arrangér farvekort
- 8.35. Angiv farvekort
- 8.36. Alienafbildning
- 8.37. Farveombytning
- 8.38. Rotér farver
- 8.39. Farveovergangsafbildning
- 8.40. Paletafbildning
- 8.41. Prøvefarvelægning
- 8.42. Undermenuen “Tonekortlægning”
- 8.43. Fattal m.fl. 2002
- 8.44. Mantiuk 2006
- 8.45. Reinhard 2005
- 8.46. Stress
- 8.47. Fjern striber
- 8.48. Retinex
- 8.49. Undermenuen “Info”
- 8.50. Histogram
- 8.51. Eksportér histogram
- 8.52. Kantgennemsnit
- 8.53. Jævn palet
- 8.54. Tærskel
- 8.55. Farvelæg
- 8.56. Farvereduktion
- 8.57. Farve til alfa …
- 8.58. Rastersimulering
- 8.59. RGB-klip
- 8.60. Hed …
- 8.61. Lokal tærskel
- 9. Menuen “Værktøjer”
- 10. Menuen “Filtre”
- 11. The “Windows” Menu
- 12. Menuen “Hjælp”
Der er mange steder i GIMP, hvor du kan finde menuer. Formålet med dette kapitel er at forklare alle de kommandoer, som er tilgængelige fra hovedmenuen øverst i GIMPs vindue og hovedmenuen, du kan få frem ved at højreklikke i lærredet. Alle genvejsmenuerne og menupunkterne for de andre dialoger er beskrevet andetsteds i kapitlerne, der beskriver selve dialogerne.

Hovedmenuen i tilstanden med flere vinduer.
![[Bemærk]](images/note.png)
|
Bemærk |
|---|---|
|
Hovedmenuen kan indeholde flere punkter, hvis du har tilføjet scripts eller udvidelsesmoduler. |
Hvis du højreklikker på bestemte dele af grænsefladen til GIMP, vil en “genvejsmenu” åbne sig, som giver adgang til flere kommndoer afhængig af, hvor du klikkede. Udvalgte steder, hvor du kan tilgå genvejsmenuer, er:
-
Et højreklik på et billedvindue viser hovedmenuen. Det er nyttigt, når du arbejder i fuldskærmstilstand uden en menulinje.
-
Et højreklik på et lag i lagdialogen eller på en kanal i kanaldialogen viser funktioner for det valgte lag eller den valgte kanal.
-
Et højreklik på hovedmenulinjen har samme virkning som et venstreklik.
-
Et højreklik på titellinjen viser funktioner, som ikke tilhører GIMP, men som tilhører din computers vindueshåndteringsprogram.
“Fanebladsmenuen” er ikke relateret til hovedmenuen, men nævnes her for fuldstændighedens skyld:
Alle dokbare dialoger har en fanebladsmenuknap
![]() . Trykkes der på fanebladsmenuknappen, åbnes en speciel menu med fanebladsrelaterede handlinger samt et punkt øverst, som åbner dialogens genvejsmenu.
. Trykkes der på fanebladsmenuknappen, åbnes en speciel menu med fanebladsrelaterede handlinger samt et punkt øverst, som åbner dialogens genvejsmenu.
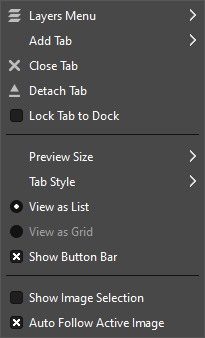
Se Afsnit 2.3.2, “Fanebladsmenu” for at lære mere om Fane-menuer.


